Add Audio- and Video-Stream to the Genvid Plugin Session
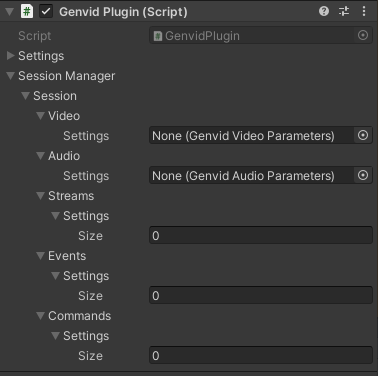
Once you’ve created a Genvid Plugin, you need to add the different streams which will make up the broadcast session. The stream types originating from your game include video, audio, and data streams. This section walks you through setting up the audio and video streams.
Video
Create a Video Parameters by using the Unity Assets contextual menu.

The Session has a Video Settings section. Drag and drop your current Video Parameters asset into this field.
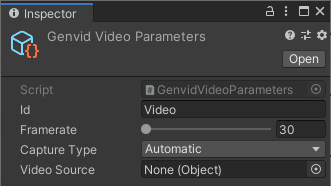
Change the Id for your video stream. The Id can just be Video.
Change the framerate for your video stream. The value should be set to 30 or 60.
Choose your Capture Type.
Automatic will capture the entire game and UI.
Texture will capture the object set in Video Source (which can be a camera or a texture). This capture type will remove the UI, but you will need to update the VideoSource public object if you decide to change capture or texture.
Audio
Create an Audio Parameters by using the Unity Assets contextual menu.
The Session has an Audio Settings section. Drag and drop your current Audio Parameters asset into this field.
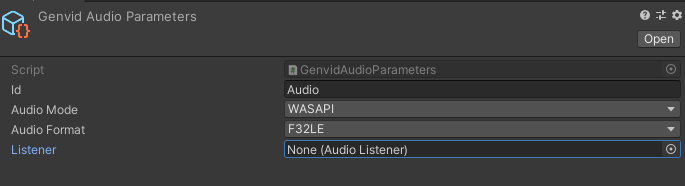
Change the Id for your audio stream. This Id can just be Audio.
Choose an Audio Format mode. We suggest to stay in F32LE unless you have specific needs.
Choose the appropriate Audio Mode.
Unity will use the Unity audio which is the default option. This is compatible with some audio plugins.
WASAPI will use the audio from your machine. This is useful if Unity audio does not work with the audio plugin currently in use.
Change the Listener if you want to use a specific Audio Listener to capture sound from your scene.