Unity integration step-by-step guide
This page explains how to integrate the Genvid SDK into your Unity application.
Important
This guide uses several elements from the Unity sample to work properly (Python script, config file, and website files). This is the fastest way to test your application locally with the stack for video, audio, and data.
- Best practices
- Testing audio and video streaming locally with the stack
- How to integrate the data sending and capture process
- How to integrate the event sending and capture process
- How to integrate the command capture and sending process
Best practices
This section covers some best practices for working with the Genvid Unity prefab.
Use a root scene for the Genvid prefab
The root scene ensures that the Genvid prefab is present only once in your application. This keeps the Genvid prefab alive between scenes, so you don’t need to place it on any other scene. When there are several instances of the Genvid prefab, it causes various issues with the stream.
Build your application to use DirectX 11
The Genvid prefab video-capture only works with DirectX 11, so you need to use
it while running your application. You can force your game to use DirectX 11 by
running it with the option -force-d3d11, but it’s not normally needed.
Use the correct type of video capture to show or hide the HUD
The HUD displays when you use Automatic video capture. The HUD won’t be
visible if you use Texture video capture.
Build your application only when the Genvid stack is stopped
When the Genvid stack is running, we use the Genvid.dll to run services. When you perform a build while the stack is running, there is no guarantee that the files will be copied properly. Make sure to stop all the jobs before performing a build with your application either from the Cluster-UI monitor screen or the Genvid Cluster-api window inside Unity.
Testing audio and video streaming locally with the stack
Here we describe how to make audio and video streaming work using our sample website and the Unity editor. Displaying data and interacting with the game require modifications to the website which we cover in How to integrate the data sending and capture process.
Import the
genvid.unitypackageinto your project via . Thegenvid.unitypackagefile is located in the package folder.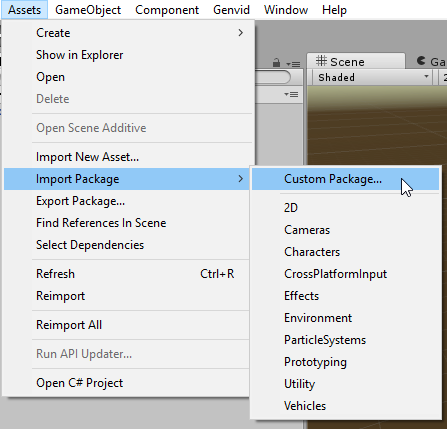
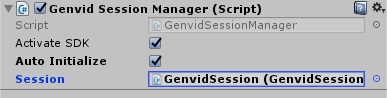
Add the GenvidSessionManager prefab to your project in a root scene. Make sure Activate SDK and Auto Initialize are both checked.
Add a GenvidSession prefab as a child of the GenvidSessionManager.
Drag and drop the GenvidSession object from your scene into the Session field of GenvidSessionManager.
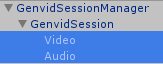
Add a Video prefab as a child of the GenvidSession.
Drag and drop the Video object from your scene into the Video Stream field of the GenvidSession.
Add a Audio prefab as a child of the GenvidSession.
Drag and drop the Audio object from your scene into the Audio Stream field of the GenvidSession.

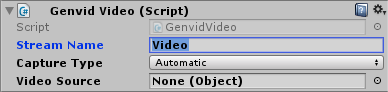
In the Video prefab:
- Change Stream Name to Video.
- Keep Capture Type Automatic. (See Genvid Video - How to handle the video stream for information about other video capture types.)
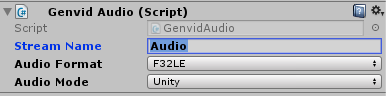
In the Audio prefab:
- Change Stream Name to Audio.
- Keep Audio Format F32LE.
- Keep Audio Mode Unity. (See Genvid Audio - How to handle the audio stream for information about other audio capture types.)
Open a command line prompt and go to the Unity sample folder.
Run
genvid-bastion install -u. (See Local Environment for more about setup and available command line options.)Run
genvid-sdk load-config-sdk.Run
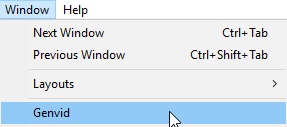
py unity.py load.Open the Genvid window inside the Unity editor via .
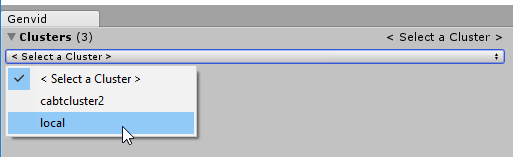
Select the local cluster from the dropdown list.
Start the Services and Web jobs from the Jobs section.

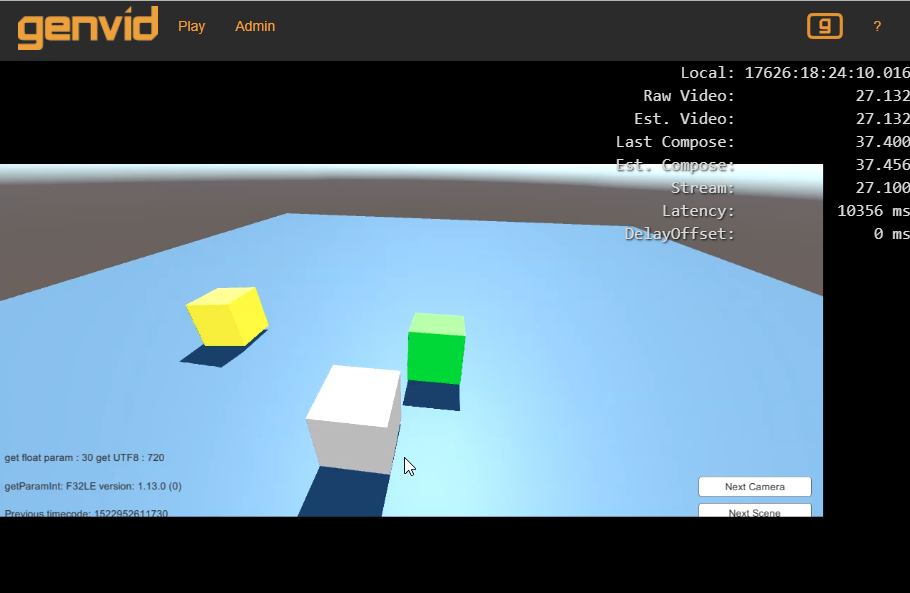
Click Open Link for Tutorial Demo in the Links section.
Click Start in the editor.
Your game should now be displayed in the website. You might need to refresh the webpage and wait for the stream to update.
How to integrate the data sending and capture process
This section covers submitting the game data from your application and receiving it in the webpage. It assumes that you already did the basic integration for the audio and video capture.
Engine integration
Add a Streams object as a child to your Session object.
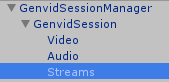
Drag and drop the Streams object from your scene into the Streams field of the GenvidSession.

Set Size to 1 under Ids.
Change the Id of Element 0 to represent the game data you want to submit.
Set Framerate to the rate that you want to submit this game data.
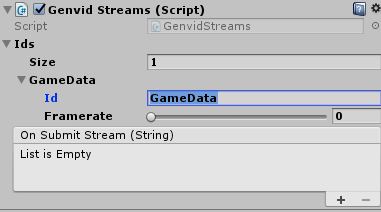
Click + to add an element to the On Submit Stream (String) box.
Create a function in your game script that receives a String parameter.
Include in your modified function one of these three functions:
- SubmitAnnotation(object streamID, object data)
The data is sent only once at a fixed time with a specific timecode.
- SubmitGameData(object streamID, object data)
The latest data is sent with a specific timecode.
- SubmitNotification(object streamID, object data)
The data is sent as fast as possible and not associated with a timecode.
The object streamID is the received String parameter and the object data is the game data that you want to send to the website. We will format this data in a later step.
Example of accessing the function from the GenvidSessionManager:
GenvidSessionManager.Instance.Session.Streams.SubmitGameData(streamId, gameData);
Create a class that will store your data.
We strongly suggest formatting the data into classes for easier access from the website, as we did in the Unity sample:
[Serializable]
public class CubePopularity
{
    [SerializeField]
    public string name;
    [SerializeField]
    public float popularity;
}
Create an instance of this class and store your data in it.
Assign the data to the Submit function you used above.
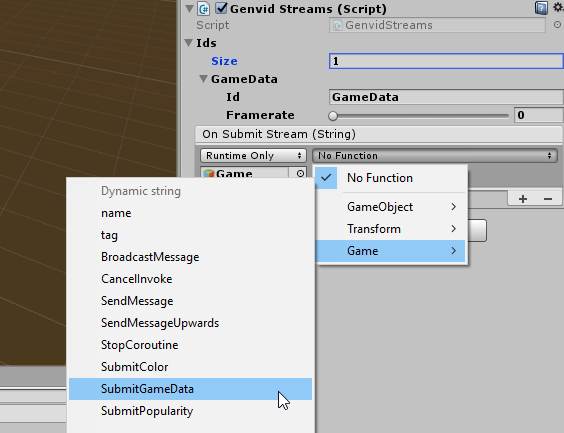
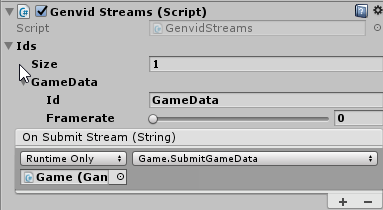
Drag and drop the object containing your game script with the new function in the On Submit Stream (String) element you added preivously.
From the dropdown list displaying No Function, select your game script and function created above.
Now that we configured the data being sent from the game, we still need to receive the data on the website.
Web integration
This section assumes you are using the unity.ts file available for the
Unity sample website.
We also suggest some steps that make data manipulation easier on the website. You can safely skip any steps you feel aren’t necessary for your project.
- Create an interface that uses the same format as your data:
    // Conversion from Json data into structure for the popularity
    export interface ICubePopularity {
        name: string;
        popularity: number;
    }
In the private
on_new_frame(frameSource: genvid.IDataFrame)function, use the frameSource to get the data from your stream. Access the data with the ID used for the Stream:frameSource.streams["idOfYourStream"]
Convert your data received into the interface created.
At this point, you should have complete access to your data. The interface lets you access specific sections of your data.
How to integrate the event sending and capture process
This section covers integrating the event-capture process with your application.
We will be using the same events.json as the Unity sample, along with
the unity.ts and index.html for the website. This section
assumes you did the steps for the video and audio capture as described in
Testing audio and video streaming locally with the stack.
Engine integration
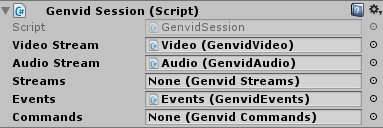
Add an Events object as a child in your Session object.
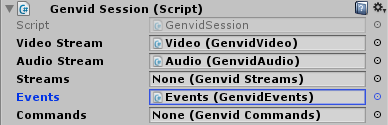
Drag and drop the Events object from your scene into the Events field of the GenvidSession.
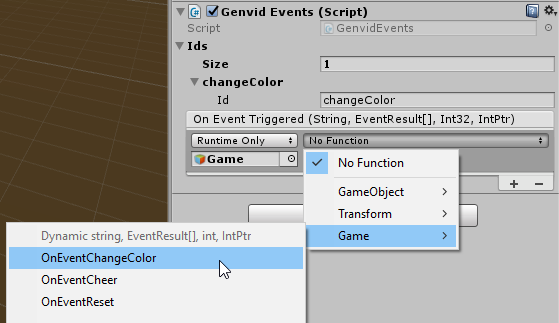
Set the Ids size to 1.
Set the Id of Element 0 to represent the game event you want to receive.

Click plus to add an element to the On Event Triggered (String, EventResult[], Int32, IntPtr) field.
Create a function in your game script that receives a String, an EventResult[], an Int32, and an IntPtr.
The EventResult[] contains the data sent from the website for you to use as needed. See this section for more information about the events for this prefab.
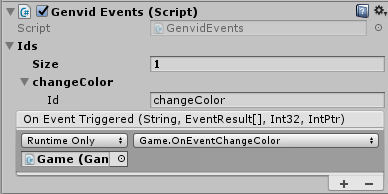
Drag and drop the object containing the game script with the new function in the On Event Triggered (String, EventResult[], Int32, IntPtr) element you added earlier.
From the dropdown list displaying No Function, select the game script and function you created.
Web integration
Open the
events.jsonfile available in the config folder.Add this entry to the map section:
{
   "id": "NameOfYourEvent",
   "source": "userinput",
   "where": {"key": ["NameOfYourEvent"], "name": "<name>", "type": "string"},
   "key": ["NameOfYourEvent", "<name>"], "value": 1
}
Add this to the reduction section:
{
  "id": "NameOfYourEvent",
  "where": {"key": ["NameOfYourEvent", "<name>"]},
  "key": ["<name>"],
  "value": ["$count"],
  "period": 250
}
See event section for more information about modifying this file for your application’s needs.
Open the
unity.tsfile available in the web -> public folder.Create a function to send an event object using sendEventObject from the Genvid client:
private onPerformTheEvent(eventContent: string) {
    this.client.sendEventObject({ NameOfYourEvent: eventContent });
}
Open the
index.htmlfile available in the web -> public folder.Create a button on the page to use your function.
<button id='myEventButton'>Click to trigger event</button>
Associate the function with the button inside the
unity.tsfile. For example, this accesses the button and adds the functions created previously to it.let eventButton = <HTMLButtonElement>document.querySelector("#" + "myEventButton"); eventButton.addEventListener("click", (_event) => { this.onPerformTheEvent(eventContentToSend); }, false);
Open a command line prompt and go to the Unity sample folder.
Run
py unity.py loadto reload the modifiedevents.jsonfile.Run
py unity.py build webto rebuild the website.
Now you should be able to use event from the website when the stream is running.
How to integrate the command capture and sending process
This section covers integrating the command capture process with your application.
We use the same admin.ts and admin.html from the Unity sample
for the website. This section assumes you did the steps for the audio and video
capture as described in Testing audio and video streaming locally with the stack.
Engine integration
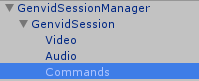
Add a Commands object as a child in your Session object.
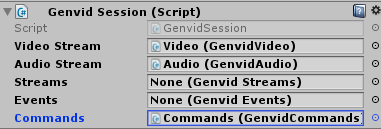
Drag and drop the Commands object from your scene into the Commands field of the GenvidSession.
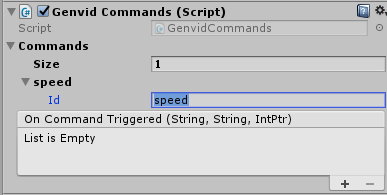
Set the Ids size to 1.
Set the Id of Element 0 to represent the game command you want to receive.
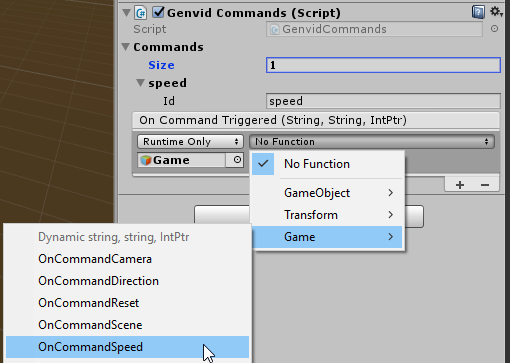
Click + to add an element to the On Command Triggered (String, String, IntPtr) field.
Create a function in your game script that receives two Strings and an IntPtr.
The second String contains the data sent from the website for you to use as needed. See this section for more information about the events for this prefab.
Drag and drop the object containing the game script with the new function in the On Command Triggered (String, String, IntPtr) element you added earlier.
From the dropdown list displaying No Function, select the game script and function you created.

Web integration
Open the
adminUnity.tsfile available in the web -> public folder.Create a function to send the command.
In this function, create a variable that contains an ICommandRequest.
Set the id to the name of the command.
Set the value to the content of the command.
let commandToSend: ICommandRequest = {
    id: "CommandName",
    value: "CommandContent"
};
Create a post web-request to /api/admin/commands/game and send the command you created.
let promise = $.post("/api/admin/commands/game", commandToSend).then(() => {
    //web request done properly
});
Open the
admin.htmlfile available in the web -> public folder.Create a button in the page to use your function.
<button class='myCommandButton'>Click to trigger command</button>
Associate the function with the button. For example, this accesses the button and adds the function created previously to it.
let commandButton = <HTMLButtonElement>document.querySelector("." + "myCommandButton");
commandButton.addEventListener("click", (_event) => { this.sendCommandFunction(commandToSend); }, false);
Open a command line prompt and go to the Unity sample folder.
Run
py unity.py build webto rebuild the website.
Now you should be able to use command from the website when the stream is running.