Genvid Studio sample
Warning
The Genvid Studio and Composition feature is provided as a preview. The elements presented here will likely change in the future. The current version is only supported in Google Chrome.
The Studio sample exposes the composition feature of the Genvid stack through a web interface. It can be used with either two instances of a game or with the Genvid Ingest sample. For this example, we use two instances of the Tutorial sample composed in different ways.
You can switch the output from one of the tutorial instances to the other, as well as create a PIP (picture-in-picture) composition. In PIP mode, you can select either of the tutorial samples as the inputs for the background picture or the PIP window. You can specify transitions between the two, as well as the window position.
Cluster configuration
Start a local cluster and set up the tutorial. After confirming it’s working, stop the services and do the following:
If you are on a The Cloud Environment, load the images and then the configuration:
py studio.py -c {clustername} upload-images --update-config
py studio.py -c {clustername} load
If you are in a Local Environment, you only need to load the configuration:
py studio.py load
You can now go back in Cluster UI and see that a new job and a link (both named
studio) were added to jobs page. You can now start streaming by clicking
the Start All button.
Once the Studio link turns blue, you can click it to access the Studio page.
The Studio website
Warning
This version of the Studio website only works on Google Chrome. It is only available as a preview and the interface will likely change in the future.
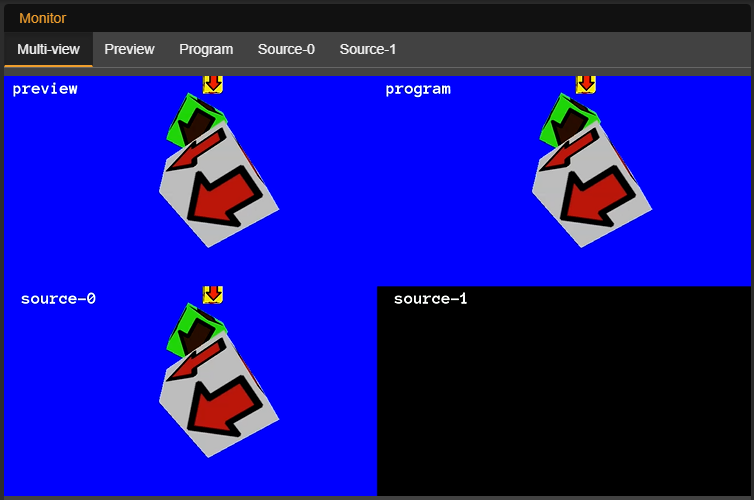
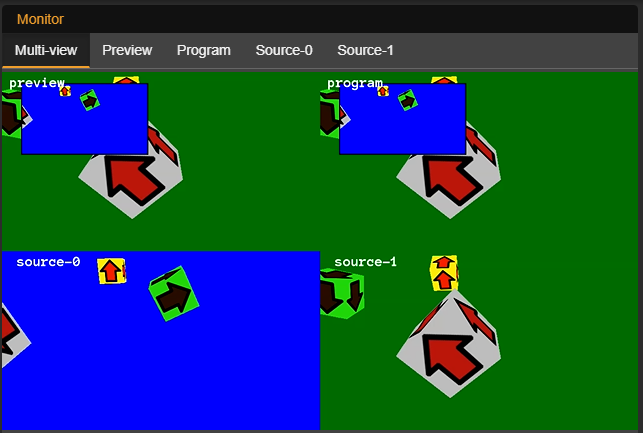
Monitor
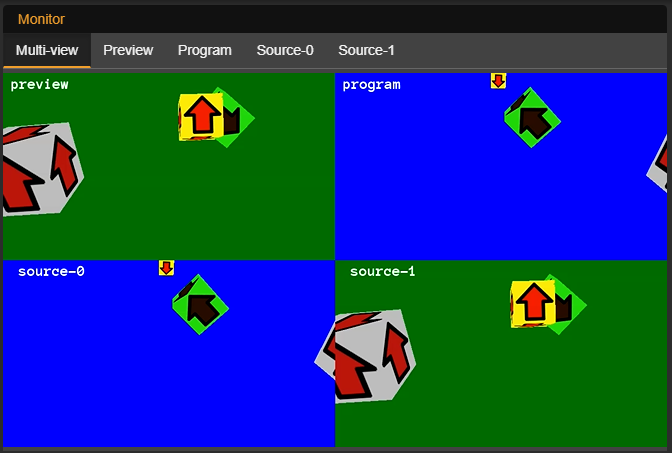
The top of the Composition page is the monitor screen. It displays four different areas:
- The top left (preview) is the current Composition settings view.
- The top right (program) is the current broadcast output.
- The bottom left is the first input.
- The bottom right is the second input.
We only started one tutorial instance, so there is only one input active.
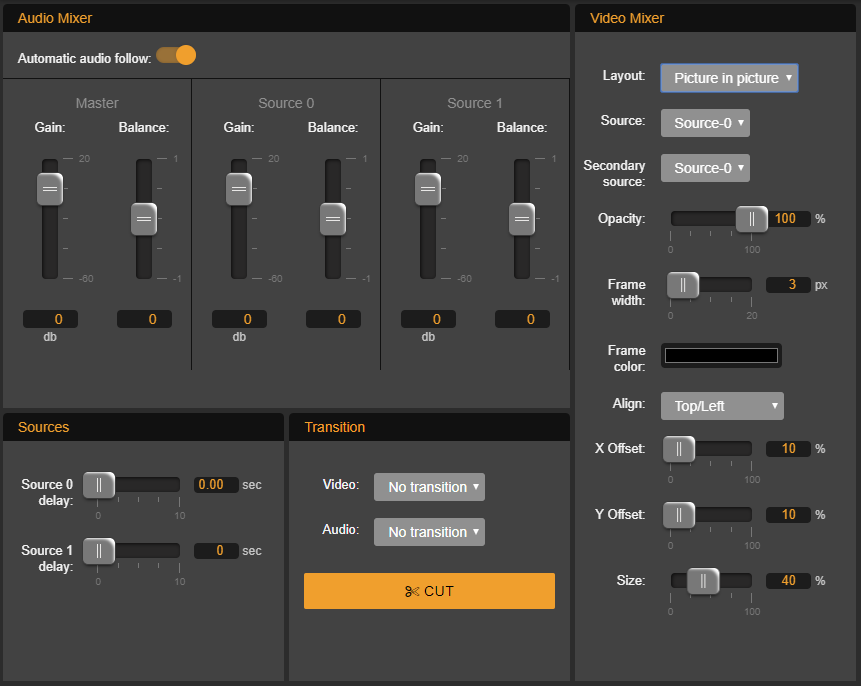
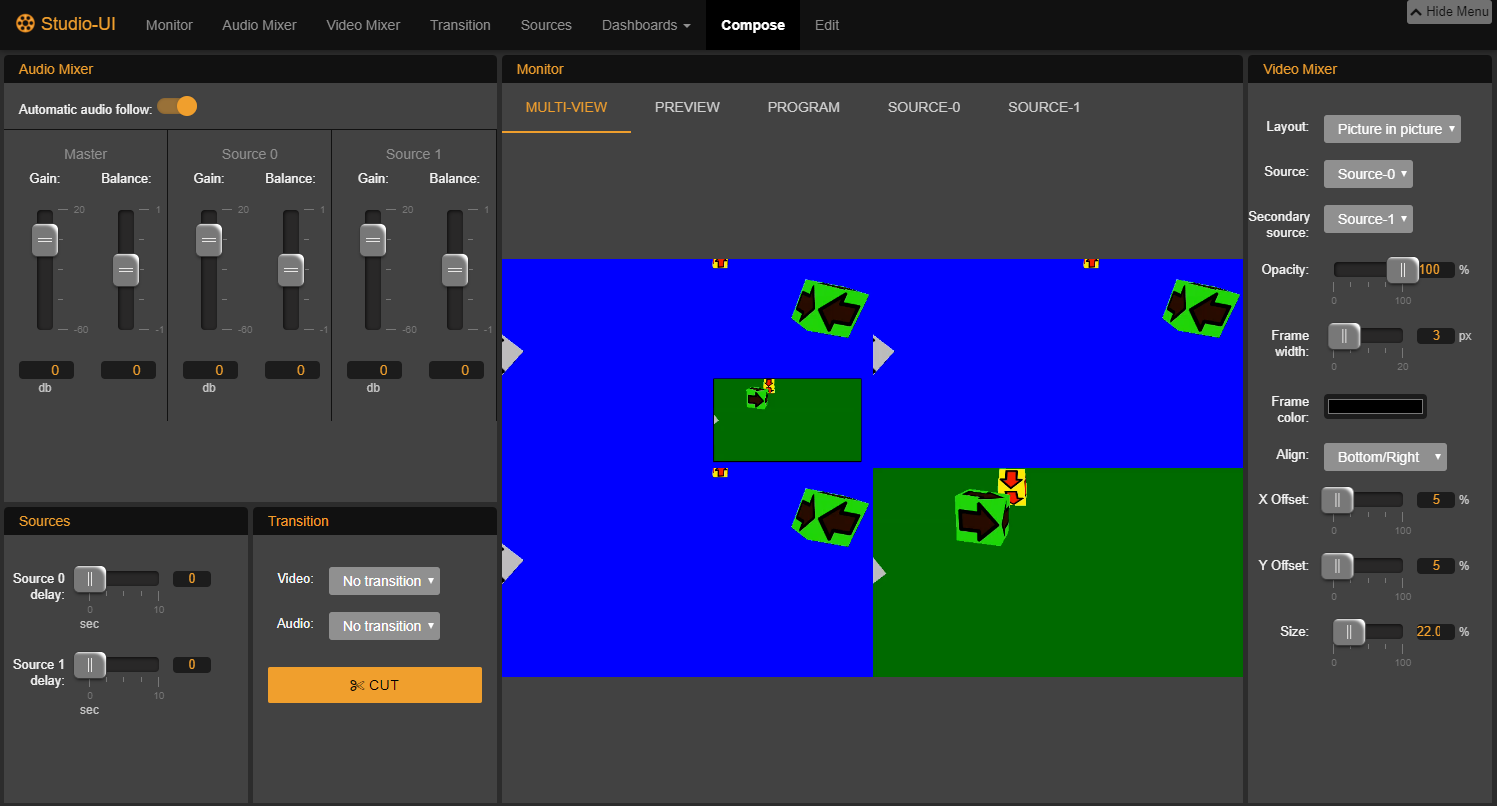
Composition editing
There are controls for modifying the composition. You can go to the individual page of a control, or use the dashboard to have all the controls at once.
Example - How to switch video source
Click the green arrow next to “tutorial” on the Cluster-UI jobs page to start a second tutorial instance.
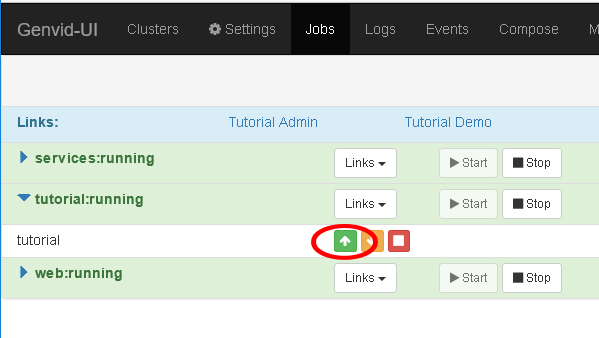
We now have two active inputs.
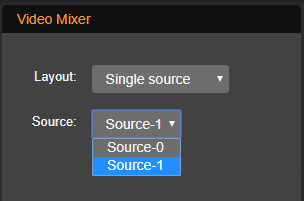
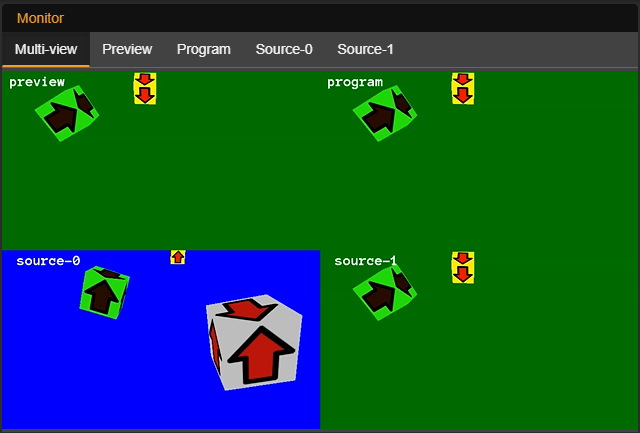
Select Source 1 as the active input in the Source of the Video Mixer.
Source 1 shows in the preview area, while Source 0 still broadcasts.
Click Cut in the Transition section of Compose to switch the streaming to Source 1.

Source 1 is now broadcasting.
Example - How to activate PIP
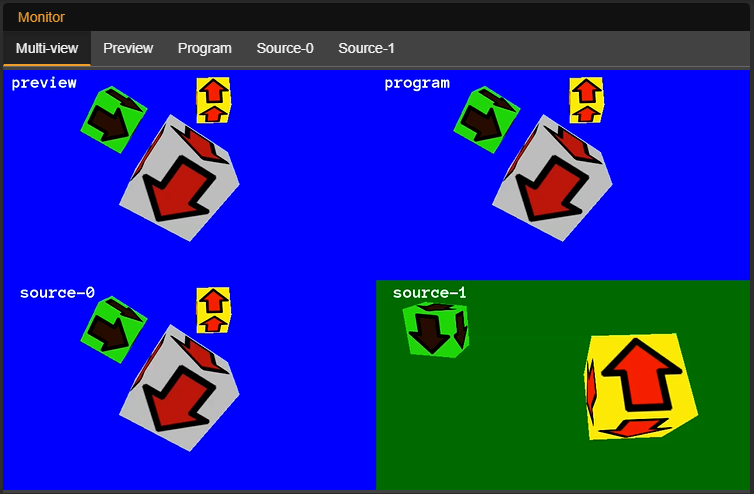
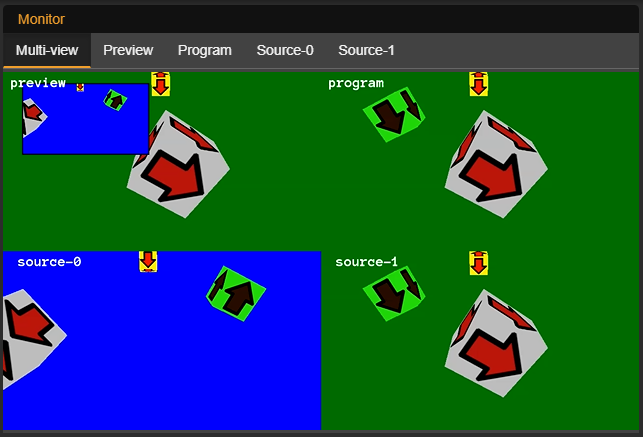
Select Picture-in-Picture in the Layout dropdown list of the Video Mixer.

Source 0 now shows in the PIP window, while Source 1 is the background image.
Click Cut in the Transition section of Compose to switch the streaming to
the PIP composition.
The PIP composition is now broadcasting.
You can now experiment with the other settings.
Dashboards
A dashboard is a specialized layout. You can create dashboard and modify them.
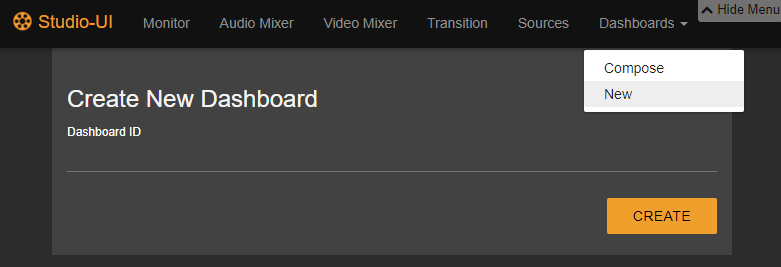
Create a Dashboard
To create a dashboard, go to the Dashboards menu and click New. You will go to a page where you can create a dashboard. Enter an ID and click Create.
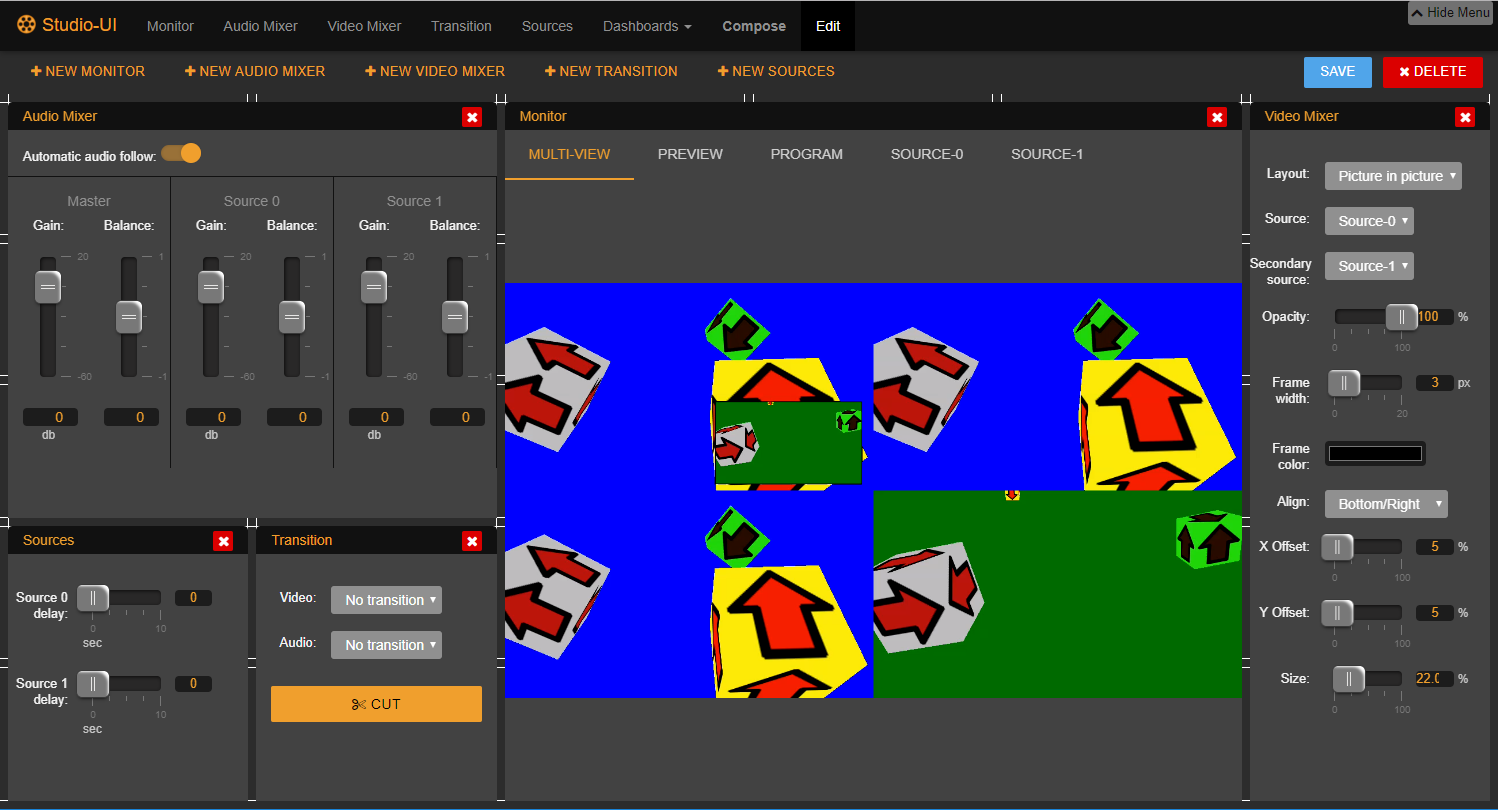
Edit a Dashboard
To edit a dashboard, click Edit on the menu. You can and, remove, move or resize components.
- To save the dashboard, click the Save button.
- To remove a dashboard, click the Delete button.
Script reference
Studio sample script
usage: studio.py [-h] [--loglevel {DEBUG,INFO,WARNING,ERROR}] [-c CLUSTER_ID]
                 {upload-images,env,load,unload} ...
Positional Arguments
| command | Possible choices: upload-images, env, load, unload |
Named Arguments
| --loglevel | Possible choices: DEBUG, INFO, WARNING, ERROR Set the script log level |
| -c, --cluster_id | |
| The cluster id. Default local | |
Sub-commands:
upload-images
Upload studiod images to the cloud
studio.py upload-images [-h] [-v VERSION] [-b BUCKET] [-p PATH] [-u]
Named Arguments
| -v, --version | The version to upload Default: “1.13.0” |
| -b, --bucket | Name of the bucket to use. Default is a combination of AWS account, bastion and cluster ids. |
| -p, --path | The path in the bucket (default: “/”). Default: “/” |
| -u, --update-config | |
Upload configuration in the current cluster. Default: False | |