Twitch Setup
In This Section
Creating a Twitch Account
If you don’t already have a Twitch account, you’ll need to create one to develop with Genvid for the Twitch service.
The simplest way to create a new Twitch account is to visit:
and click the Sign up button in the top right corner.
Follow these steps and you should have a Twitch account in no time.
Configuring Live Streaming
Now that your account is created, we need the address, the stream key, and the channel for your configuration to work with your Twitch account.
- Address
- This link explains how to create the address needed https://help.twitch.tv/customer/portal/articles/2420572#BroadcastURLsandStreamKeys For Genvid, we only need rtmp://<twitch-ingest-server>/app so without the stream key as indicated in the link.
- Channel
Your Twitch channel name is normally your username. To verify your channel name:
- Go to https://www.twitch.tv.
- Click your username to open the drop-down menu.
- Select Channel.
This displays your channel page. Your channel name is the part of the page URL following https://www.twitch.tv.
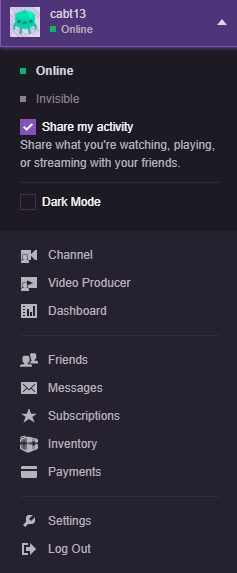
Fig. 31 Twitch drop down menu
- Stream key
- The stream key is found in your Twitch dashboard.
- Go to https://www.twitch.tv.
- Click your username to open the drop-down menu.
- Click Dashboard.
- Click Channel under Preferences on the left side of the page.
- The key will be under the Stream Key & Preferences section in the Primary Stream key subsection.
- Click Show.
- Click I Understand.
- Your stream key is the entire string shown in the Primary Stream key subsection.
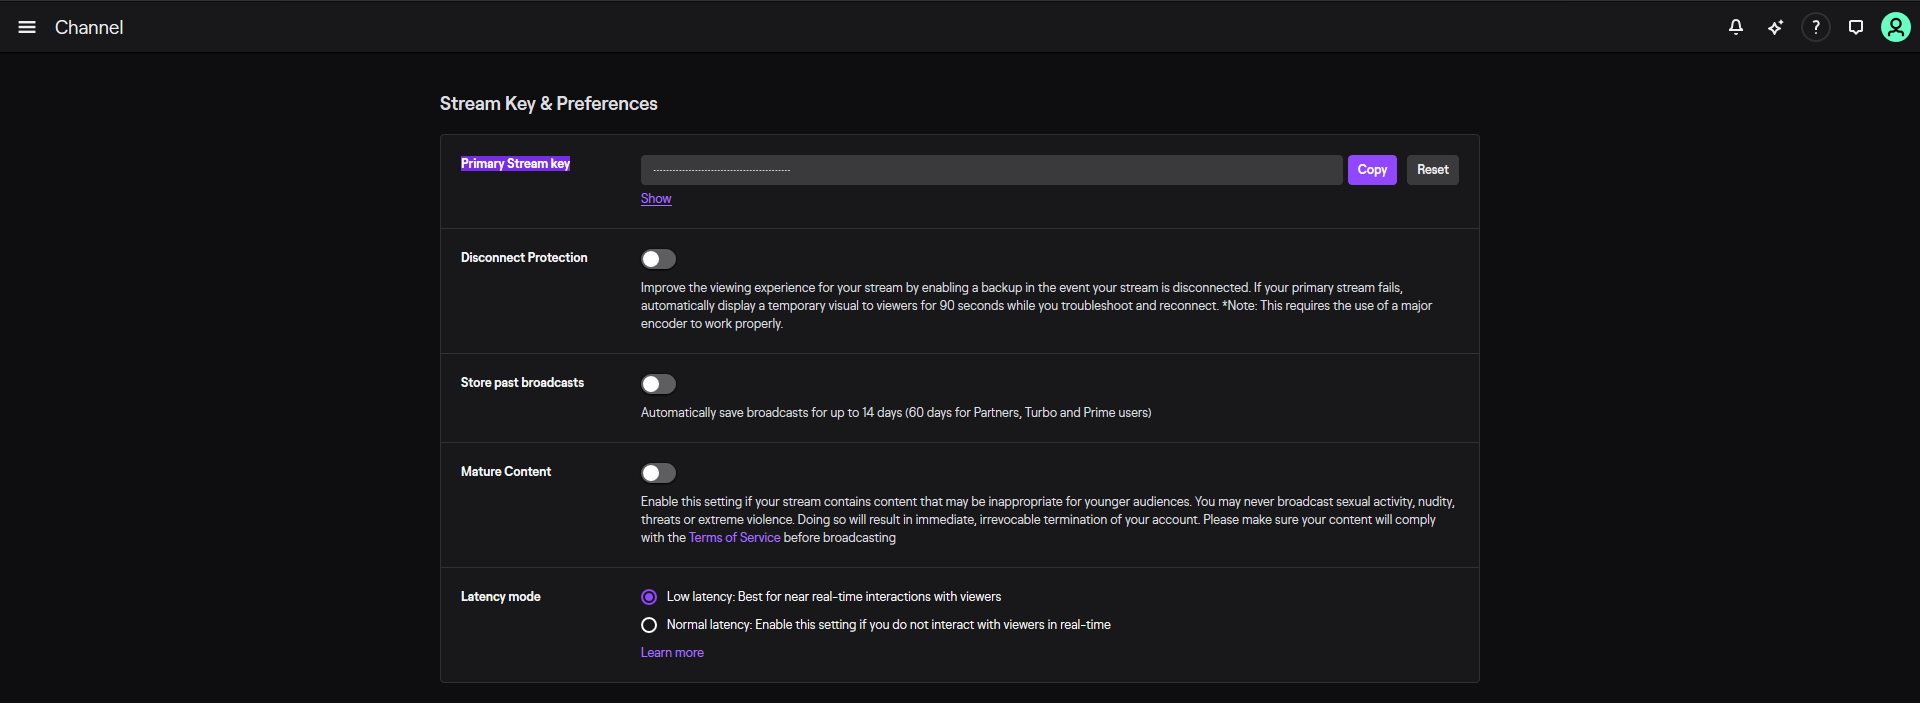
Fig. 32 Twitch Channel Settings
Settings
Once you have all the information above, you can edit your configuration file. The result should be set to the following:
version = "1.7.0"

settings {
    encode {
    stream {
      enable  = true
      service = "twitch"
      // YOU MUST CHANGE THE ADDRESS, CHANNEL AND KEY VALUE
      addr    = "rtmp://<twitch-ingest-server>/app"
      channel = "channelname"
      key     = "live_NNNNNNNN_XXXXXXXXXXXXXXXXXXXXXXXXXXXXXX"
    }
  }
    leaf {
    port = 30001
  }
  services {
    leaf {
      websocketURLSuffix = "/socket"
    }
  }
} // end of settings

link "twitch" {
  name     = "Twitch Channel"
  template = "http://twitch.tv/${key `genvid/encode/stream/channel`}"
} // end of link "twitch"

config {
  twitch_embed {
    enabled = true
  }
} // end of config
Alternatively, once your Cluster UI is up, you can manually enter this information in the Settings page.
Important
Twitch Extension is partly supported for development, but requires a more complex setup and is not ready for certification. We also plan to provide full instructions along with a complete demo in an upcoming version of the SDK. In the meantime, please contact us if you want to know more.