Using Clusters
Creating a Cluster
To create a cluster, the Genvid Bastion must be running. You can use the genvid-bastion script to manage it. The following command starts the minimal services required.
genvid-bastion install --bastionid mybastion --checkmodules --update-global-tfvars --loadconfig
--bastionid mybastionA unique identifier for your bastion. It must:
- Be between 3 and 32 characters.
- Only contain lowercase letters, numbers, or hyphens.
- Start with a letter.
--checkmodules- Use this option to install new modules if none exist or update the ones already present.
--update-global-tfvars- Use this option to update the global Terraform variables.
--loadconfig- Use this option to load the jobs and logs.
The next step is to open a Bastion-UI website to manage the Clusters.
genvid-bastion monitor
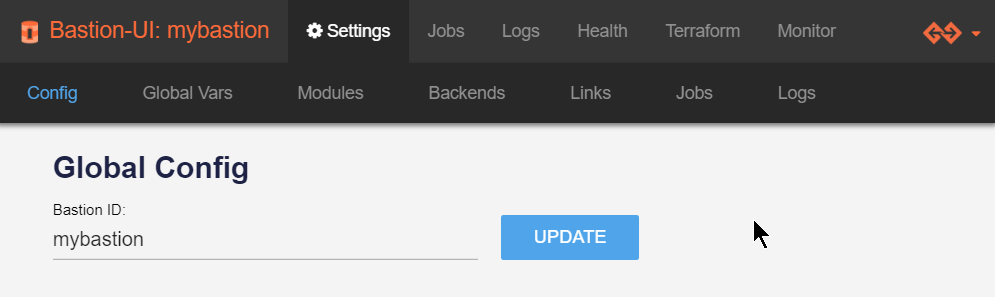
On the Bastion-UI page, you can customize the Bastion name.
- Modify Bastion name.
- Click on Update
On the Terraform page:
- Click
Add Config.- Enter a unique
ID.- Choose
clusteras the category.
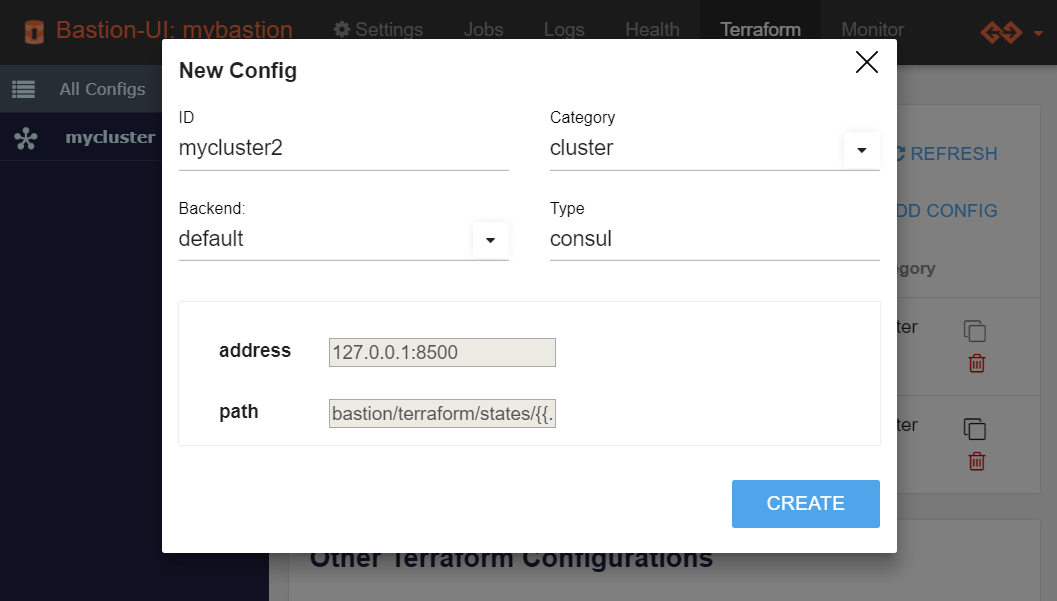
You can select another backend if needed. For now, you can stick with
the default values. Some backends may require configuring variables.
Cloning a Cluster
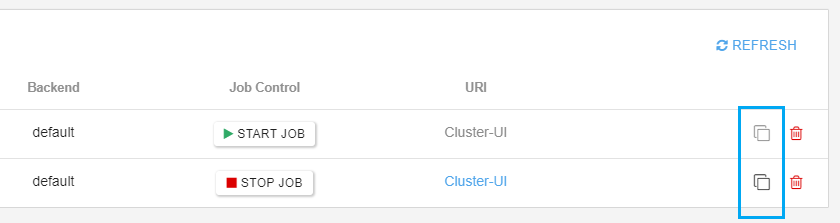
It is also a good practice to use the cloning function when you want to create different clusters with a similar configuration. You can do so by clicking on the clone button on the Terraform configuration view.
Cluster Statuses
After creating a cluster, its status is EMPTY. This means that the cluster needs a module. The cluster statuses are:
- VOID: The cluster doesn’t exist.
- EMPTY: Cluster created but without a module.
- DOWN: Cluster is initialized but resources are empty.
- UP: Terraform apply procedure has succeeded.
- BUSY: A command is currently running.
- ERROR: An error occured when checking the cluster.
- INVALID: Invalid or unknown status.
Importing a Terraform Module
Before configuring the cluster, you must initialize it with a module. This copies the module template and downloads any modules and plugins it requires.
- Click Commands.
- Select the SDK-{version}/basic/basic_cluster module.
- Click Import module.

You will see an initialization log appear. This step should last only a few seconds.
Terraform Settings
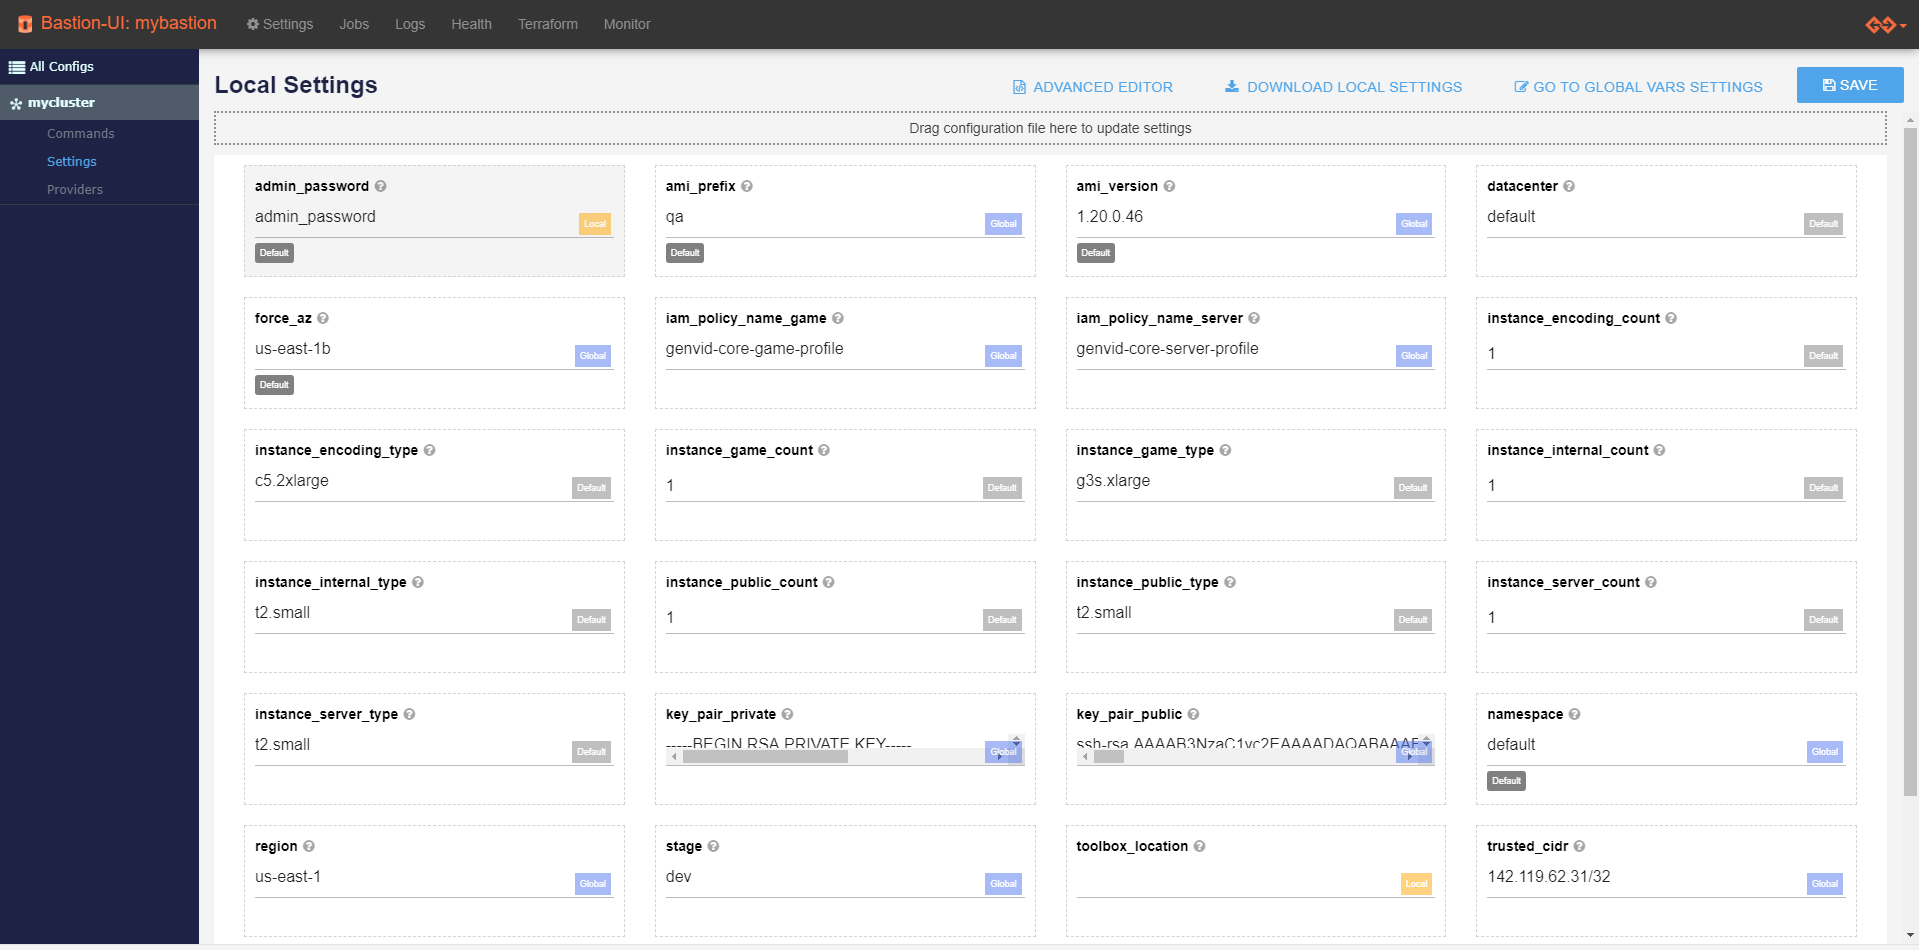
We use Terraform to build the cluster insfrastructure, so the setting values configure the cluster infrastructure. Click the Settings sub link for your cluster and edit the settings.
For ease of use you can also download the settings on the page to a JSON file. You can drag and drop the edited file on the form to edit multiple settings at once or revert to a previous configuration. Please note that all unsaved configurations will be lost.
| Setting | Description | Default Value |
|---|---|---|
| admin_password | The administrator password for the Windows machine. The Windows machine is only accessible from the other server instances and from other machines that share the same external IP as yours [1]. | 1genvid6 |
| ami_prefix | A common prefix for the game AMI. This is the prefix we use in the Save the AMI section. You can change it if you want to experiment with your own AMI. | default |
| ami_version | A filter prefix for finding the right version of the AMIs. You can change it if you want to bind your cluster to a different SDK version. | Current SDK version |
| datacenter | The datacenter name Nomad uses to group local agents together. | default |
| force_az | Force all instances to be configured in a given availability zone. It should be the same as the one in Start the AMI. The availability zone has to be specified in full, such as us-east-1d. If a zone doesn’t have any G2 or C5 instances available, you must change to a zone that does. Currently, there’s no way to know in advance if an instance will be available in a specific zone. | none |
| instance_encoding_count | Specifies the number of encoding servers that Terraform should create. | 1 |
| instance_encoding_type | Specifies the type of AWS instance that Terraform should use for encoding servers. | c5.2xlarge |
| instance_game_count | Specifies the number of game servers that Terraform should create. | 1 |
| instance_game_type | Specifies the type of AWS instance that Terraform should use for game servers. | g2.2xlarge |
| instance_internal_count | Specifies the number of internal servers that Terraform should create. | 1 |
| instance_internal_type | Specifies the type of AWS instance that Terraform should use for internal servers. | t2.small |
| instance_public_count | Specifies the number of public servers that Terraform should create. | 1 |
| instance_public_type | Specifies the type of AWS instance that Terraform should use for public servers. | t2.small |
| instance_server_count | Specifies the number of admin servers that Terraform should create. | 1 |
| instance_server_type | Specifies the type of AWS instance that Terraform should use for admin servers. | t2.small |
| region | The AWS region where you want to create your cluster. You can use any region that contains G2 instances. | us-east-1 |
| namespace | The name of the current deployment project on your cluster. This value is part of the AWS Tags configuration, making it easier to group resources together in the AWS Console. | deployment |
| stage | The name of the stage your cluster should belong to. This value is part of the AWS Tags configuration, making it easier to group resources together in the AWS Console. | dev |
| vpc_cidr_block | Specifies the CIDR block Terraform uses to create new subnets in a newly created VPC. It works in conjunction with vpc_auto_create. You can switch it to any CIDR block you prefer. | 10.0.0.0/16 |
| admin_username | Specifies the name of the administrator account use to connect and initialize the cluster VMs. | gadmin |
| [1] | Future versions of the Cluster will use a bastion host instead for increased security. |
The next 2 settings’ values are provided automatically to the Terraform configuration via environment variables. You don’t need to set them manually.
clusteris the name of your cluster.bastionidis the name of your Bastion.
The basic_cluster configuration takes care of everything: creating a new
VPC, key pair, etc. If you want more control or your permissions don’t let you
create an AWS VPC or Roles, we also have the minimal_cluster configuration
which lets you provide those elements yourself:
| Setting | Description | Default Value |
|---|---|---|
| key_pair_private | Specifies the private part of the SSH key used to manage the EC2 instances. The key should look something like this: —–BEGIN RSA PRIVATE KEY—–n… n—–END RSA PRIVATE KEY—–n | null |
| key_pair_public | Specifies the public part of the SSH key used to manage the EC2 instances. The key should look something like this: ssh-rsa … | null |
| iam_policy_name_game | Specifies the IAM policy that Terraform should attach to game servers. The default value lets Terraform create new policies. | null |
| iam_policy_name_server | Specifies the IAM policy that Terraform should attach to Genvid servers. The default value lets Terraform create new policies. | null |
| vpc_id | Specifies the VPC ID to use instead of creating a new one, which enables sharing VPCs between clusters. A vpc_id should look something like this: vpc-… | null |
See the Terraform Configuration Documentation for more information on how to set up these variables globally or locally.
Terraform Providers
Providers are specific to a cluster and, more specifically, to the module imported in that cluster. Thus, let us start by creating a new cluster and importing some module on it.
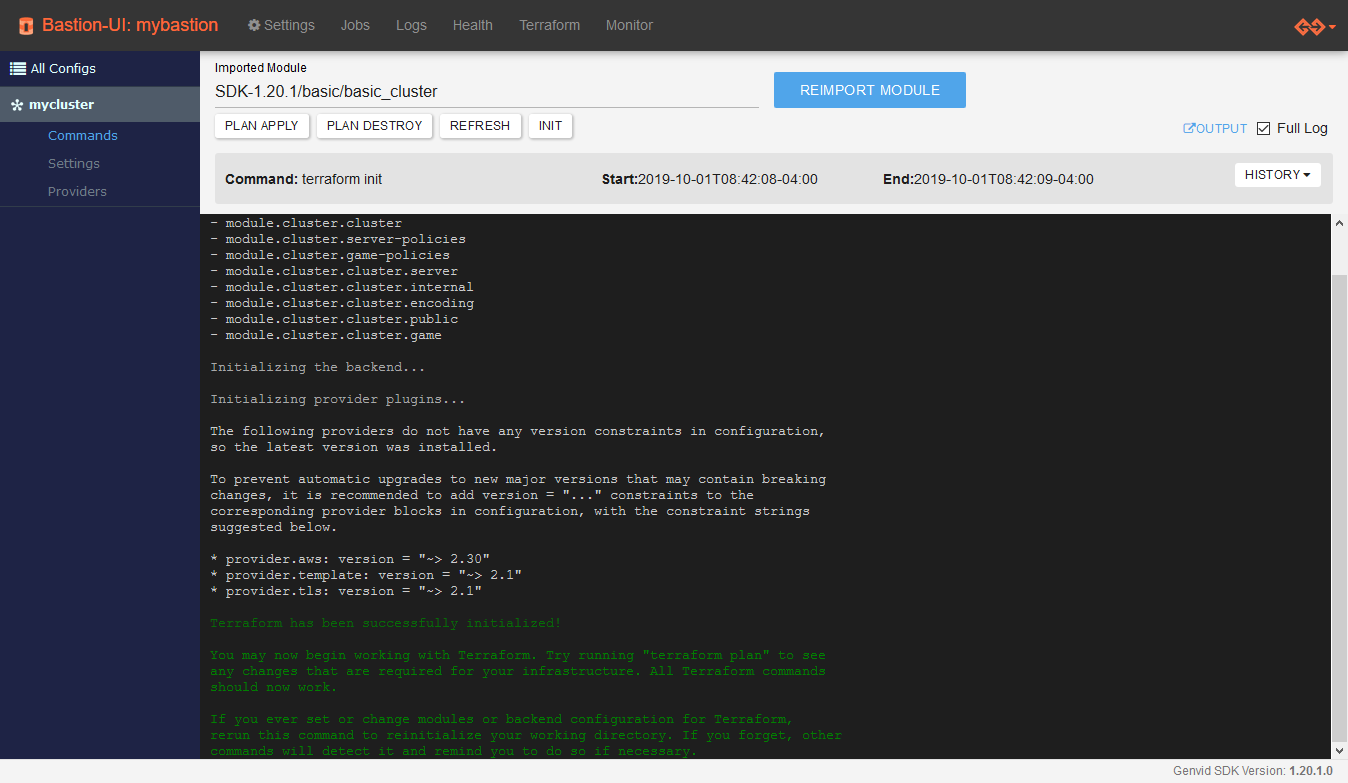
Fig. 6 On the first import, you will see the provider plugins being downloaded. It is a great way to know which providers are used by a specific module.
Every provider has its own set of arguments it recognizes. The best way to know how a specific provider can be customized is by visiting the Terraform Providers page and looking up the specific providers you are interested in.
Important
You should always specify the version to use for each provider when
importing the module. If you don’t, the terraform init command will use
the newest version available for each. This can lead to an unstable
environment if any updates introduce a breaking change.
See the Terraform documentation for more information.
Customizing Terraform Providers
(Global) Default Configuration
There are two levels at which providers configuration can be customized: at the global (bastion) level or on the cluster directly after importing a module. The global configuration is meant to give a default configuration to new clusters (or on a reimport of the module).
During the installation of the bastion, we set up such a configuration so
that your clusters work out of the box with any of the modules we provide.
The information is loaded from a file stored at
bastion-services/terraform/providers/default.json.
When you import a module into a cluster, only the default configurations for providers that this module uses are applied. So it’s safe to add configurations for providers that aren’t used by every module.
To add a new default configuration for a provider:
Open the Bastion UI page.
Click Settings.
Click Providers.
Click + NEW PROVIDER.
Enter a unique name for Provider and Alias to identify the provider you want to customize.
- OPTIONAL: You can also set a specific default Version to use for that provider.
Important
The identifiers you use for Provider and Alias are checked when you import a module into a cluster. If they don’t match a provider used by that module, the default configuration won’t be applied.
If you have one or more arguments you need to set for a provider, click + to add each.
Click SAVE to save the provider configuration.
Per-Cluster Configuration
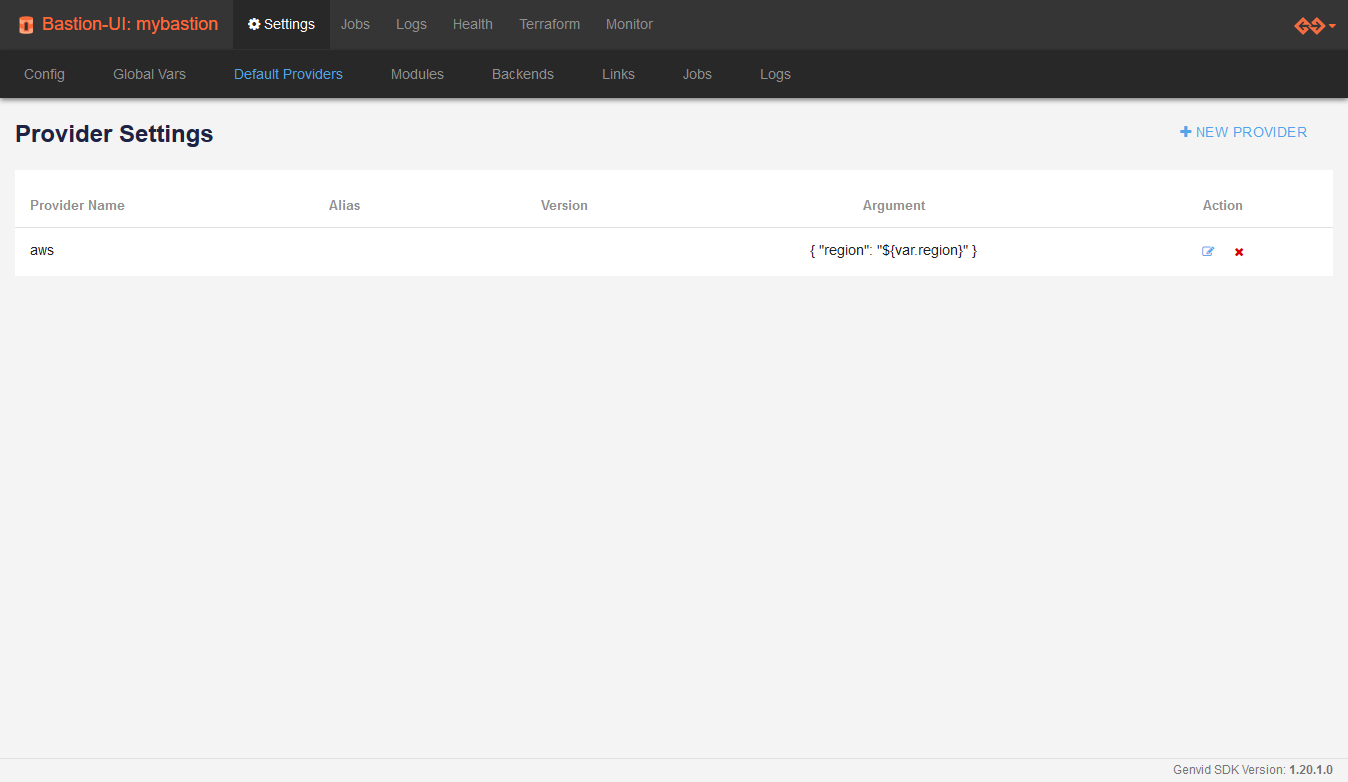
After importing a module on your cluster, you can go to the Provider tab (under Terraform) to see its current configuration.
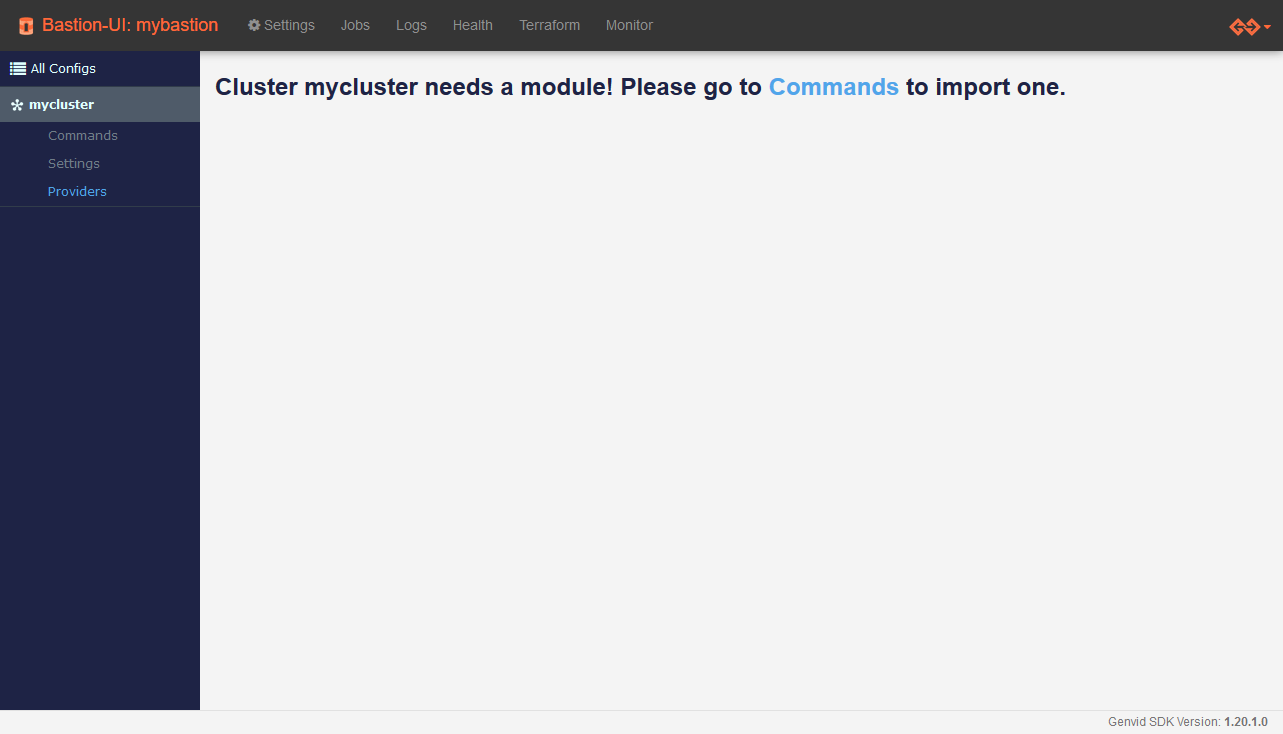
Fig. 7 Like for the Settings tab, if you did not import a module yet, you will be invited to do so by going to the Commands page.
By default, the configuration should be empty, unless some providers have a global configuration which will be automatically applied by this point. Any further change made to the cluster’s providers will only affect that cluster.
Warning
If the cluster’s module is re-imported, the global configuration will override its configuration.

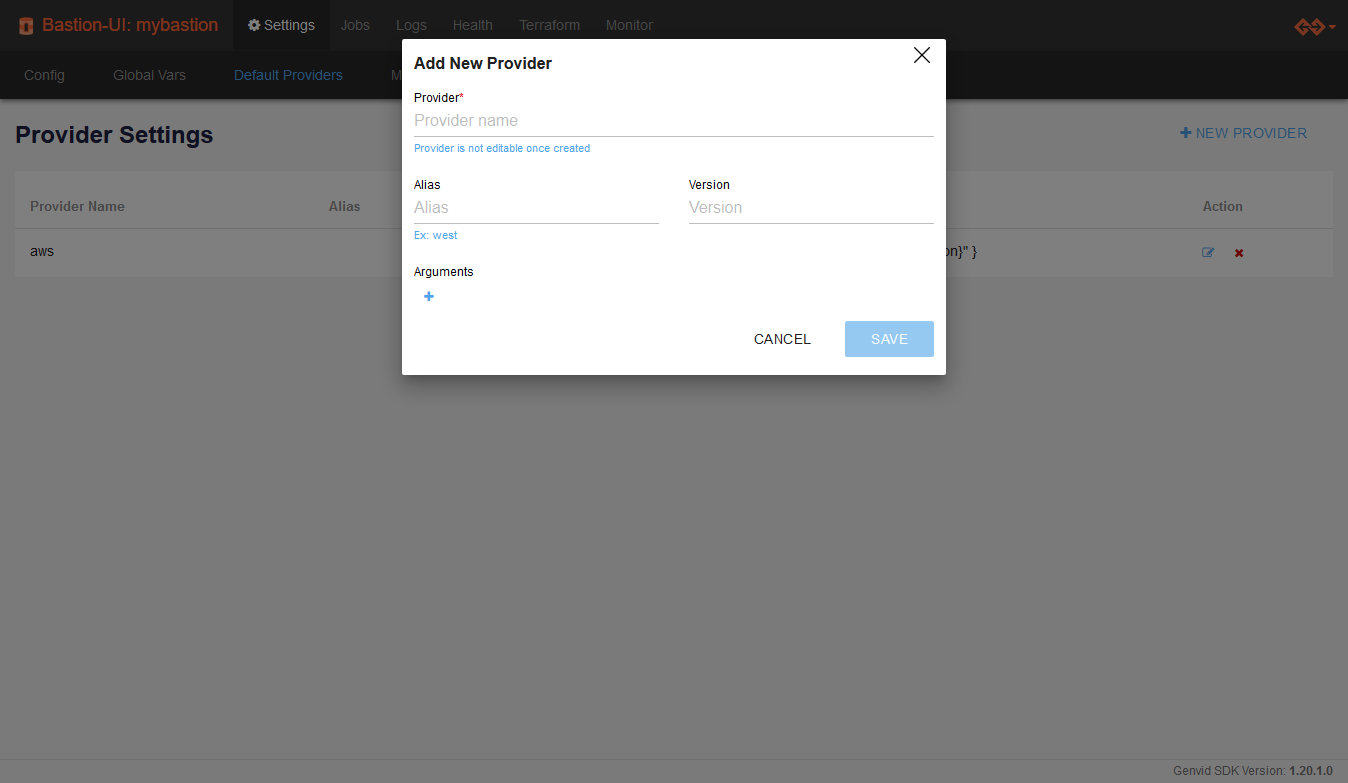
Fig. 8 As you can see in this example, Terraform variable interpolation is supported to specify values for the providers’ arguments.
Once your cluster is created and you know which providers you want to customize, you may go to Terraform, from the top menu, and then Provider under the cluster’s name from the left menu.
Important
After modifying the version of a provider you need to execute a new
terraform init command for the new version to be downloaded.
The process to customize providers is very similar to the global case. The + ADD PROVIDER button is used to add a configuration for a provider not yet listed. Otherwise, the edit button (the left Action button) can be used to customize existing configurations.
Warning
The changes to the providers configuration might not take effect until a Refresh command is issued.
Terraform Providers Arguments
You will notice that we distinguish between meta-arguments such as version and alias and other arguments.
Those meta-arguments are present on all providers and are considered during
Terraform’s init phase. The other arguments are used during the plan or
apply phase and vary between providers.
Note
If you notice some arguments are ignored at the plan phase, try to
issue a Refresh to update Terraform’s state with the new
configuration.
Provider aliases might not be useful unless you write your own Terraform module, but the version is very important as we’ve seen above. More information can be found on Terraform Provider Configuration page.
Terraform Providers Toolbox Support
We offer subcommands in the Toolbox to help managing providers. The following table summarizes the commands available.
| Command | Description |
|---|---|
| genvid-bastion get-default-terraform-providers | Display the current global providers configuration in JSON. |
| genvid-bastion set-default-terraform-providers | Set the global providers configuration from a JSON file matching the format from get-default-terraform-providers. |
| genvid-bastion delete-default-terraform-providers | Delete the existing global providers configuration. |
| genvid-clusters get-terraform-providers | Display the current providers configuration of a specific cluster. |
| genvid-clusters set-terraform-providers | Set the providers configuration of a specific cluster from a JSON file matching the format from get-terraform-providers. |
| genvid-clusters delete-terraform-providers | Delete the existing providers configuration of a specific cluster. |
While the easiest way to create a new providers configuration is to use the bastion UI and then the toolbox to redirect the configuration into a file, here is an example in case you want to write it by hand:
[
    {
        "provider": "aws",
        "meta": {
            "alias": null,
            "version": "~> 2.17"
        },
        "arguments": {
            "region": "us-west-2"
        }
    },
    {
        "provider": "template",
        "meta": {
            "alias": null,
            "version": "~> 2.1"
        },
        "arguments": {}
    },
    {
        "provider": "tls",
        "meta": {
            "alias": "myalias",
            "version": null,
        },
        "arguments": {}
    }
]
Applying a Terraform Infrastructure
Terraform Apply is the operation that builds the cluster infrastructure.
- Click Plan Apply to create an execution plan.
- Verify the changes match what you need.
- After verifying the changes, click Apply to execute the plan.

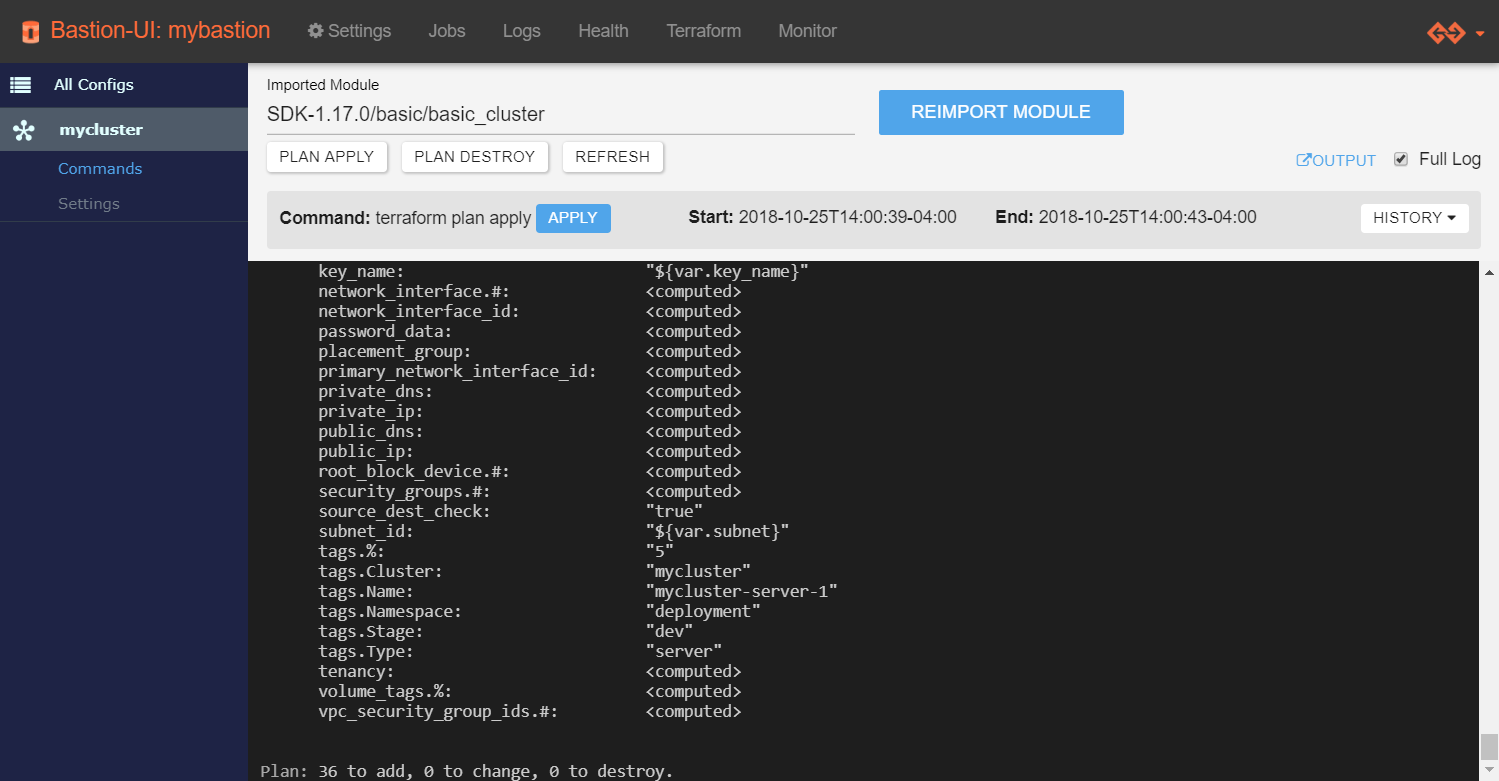
You should see the log starting to appear.
- If Terraform fails to build the infrastructure:
- Check the error message.
- Update the settings.
- Apply again.
At the end of this step, there is a cluster running on the cloud. When you check All Configs on the Terraform page, the status is UP. This means that the infrastructure is up, but the Genvid SDK is not yet present in it.
Important
Beginning in version 1.19.0, instances provision in the background after Terraform creates them. You need to wait until an instance registers as a Nomad client in the Cluster UI before using it. In particular, Windows instances may take up to 30 minutes before they are ready.
Note
The public machine IP is not the same as the one used when setting up your AMI.
To access your game machine, use the IP from game_public_ips
with the same password set during the AMI setup.
To retrieve the game_public_ips:
- Make sure the cluster is
UP. - Go to the Commands page of your cluster.
- Click the OUTPUT button.
You’ll find the game_public_ips listed in the JSON file.
Setting up the SDK on a Running Cluster
Once a cluster status is UP, you will need to set up the Genvid SDK on it and run your project there.
Follow the SDK in the Cloud guide to do so.
Destroying a Terraform Infrastructure
The terraform destroy command removes all resources from the cluster
configuration. You should only destroy a cluster’s Terraform infrastructure
when you no longer need to run your project on that cluster. To destroy the
Terraform infrastructure, click Plan destroy.
If you’re sure you want to destroy the current Terraform infrastructure, click the Destroy button to confirm.
See Destroy Infrastructure for more information.
Deleting a Cluster
To delete a cluster, you have to destroy the Terraform infrastructure first. Go to All Configs and click the Delete button.
Using Custom Repositories
You can add and remove individual Terraform repositories in the bastion. Each repository contains one or more modules that can be used to instantiate a cluster. Use the following command to list the current repositories:
genvid-clusters module-list
Use the following command to add a new module:
genvid-clusters module-add -u {URL} {name}
{URL}can be any source compatible with go-getter, including local files.{name}is the destination folder to this repository on your bastion.
After the URL is cloned in the bastion repository, it will be available as a
source under modules/module. See Terraform’s Module Configuration
for more details on using modules.
Bastion remembers the origin of each module, so you can update them using the following command:
genvid-clusters module-update [name]
The name is optional. If you don’t provide a name, it will update all repositories.
You can remove a module using the following command:
genvid-clusters module-remove {name}
See also
- genvid-clusters
- Genvid Cluster-Management script documentation.
- Bastion API for Terraform
- Bastion API for Terraform.
- Terraform’s Module Configuration
- Documentation of Modules on Terraform.
- go-getter
- A library for fetching URL in Go.