Cube Sample Application
This section explainins the UE4 Cube Sample application and how to use the Genvid Plugin and Module.
- Origin
- Content
- C++ Classes
- Blueprint Classes
- Blueprint Structures
- How to run the Cube sample
- Genvid integration
- Notes
- Assets
See Local Environment Usage for more information about running the Cube sample.
Origin
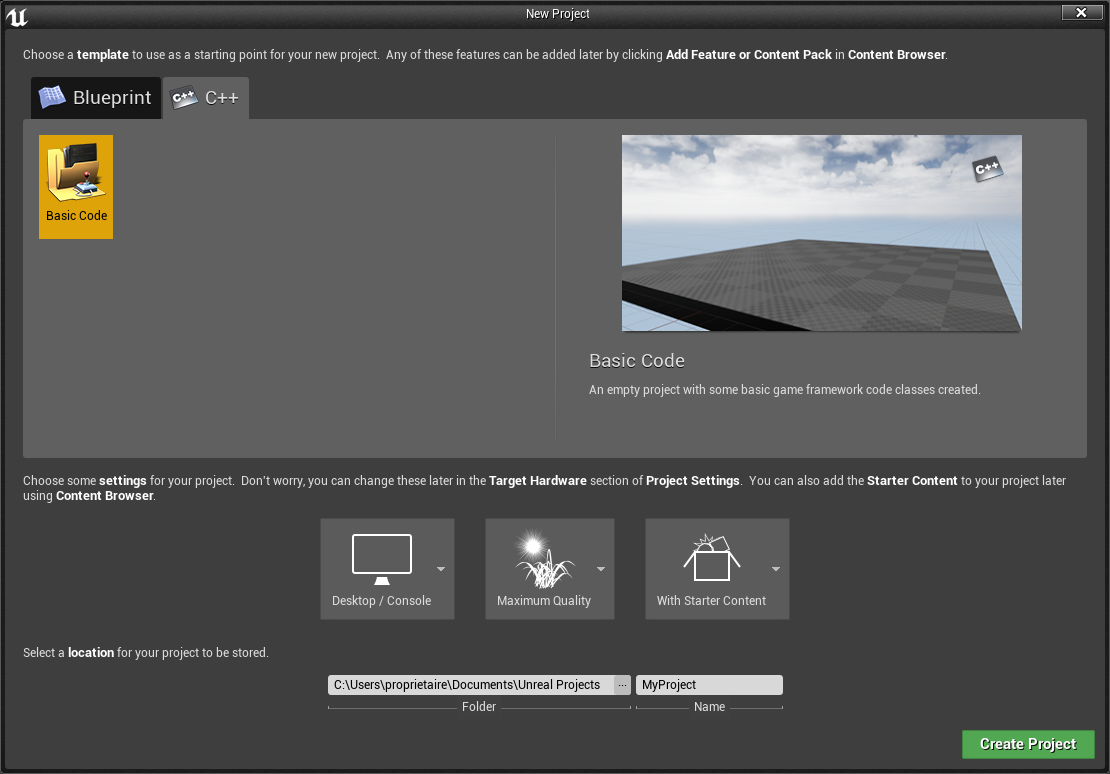
The Cube sample uses the Unreal Engine 4 Basic Code template (New Project).
The Cube sample is an adaptation from the Tutorial sample code.
We added all available features to show all parts of the Genvid integration.
Content
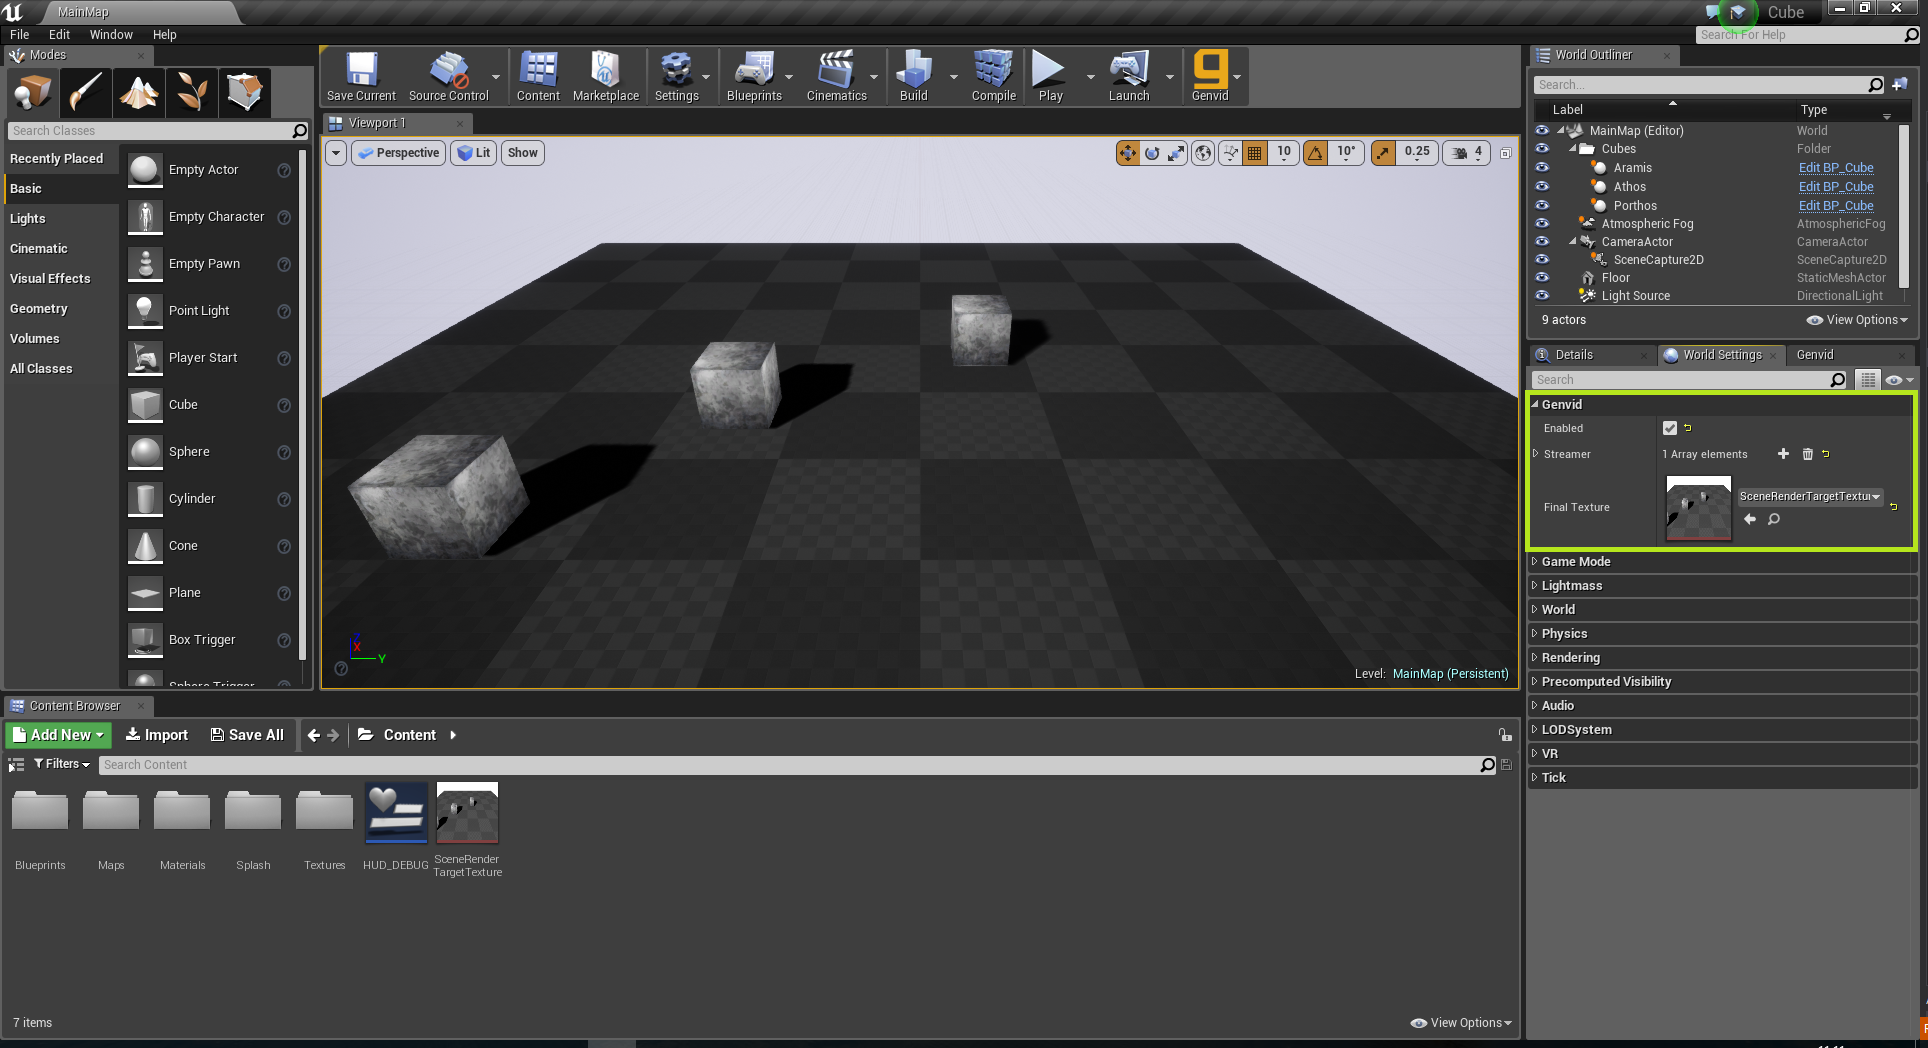
The Cube sample displays 3 cubes named Athos, Porthos, and
Aramis. These cubes rotate and move in various fixed directions. Upon
reaching the extremity of the world, a sound plays and the cube moves
to the opposite side of the world to continue its movement without
interruption.
C++ Classes
Cube.cpp: This file implements the game module.Cube.h: Header file of the game module.
ActorCube.cpp: Actor class which contains the matrix- transformation functions for the cubes.
ActorCube.h: Header file that declares the function to be- callable in Blueprint.
GameStreamer.cpp: Class derived from UGenvidStreamer and- contains the view projection matrix of the player.
GameStreamer.h: Header file that declares the function to be- callable in Blueprint.
Blueprint Classes
BP_Cube: Class used to show and manage a cube.BP_Game: Class used to manage the Genvid events.
Blueprint Structures
BP_CubeData: Structure used to store the cube data.
BP_GameData: Structure used to store all cubes and the view projection- matrix.
BP_NameToColor: Structure used to store a color and its name.BP_Popularity: Structure used to store the popularity of a cube name.BP_PopularityData: Structure used to store all the cubes’ popularities.
How to run the Cube sample
This guide assumes that your config file is properly set up with a working
YouTube account (see Genvid Configuration) and that you can successfully
run the Genvid services (see Local Environment Usage).
- Declare an environment variable named
UE4ENGINEDIR that
points to the Engine directory of your version of Unreal Engine 4.
By default, it uses UE4ROOT/Engine, where
UE4ROOT is the installation directory of Unreal Engine 4.
- Prepare the cube folder for building.
- This will copy the Genvid Plugin and Genvid Module under the
cube/app folder.
- Build the project (app and website).
This generates the Visual Studio solution for the project and immediately
tries to build it.
Note
If you encounter any issues when building the package:
- Verify the uproject file is associated with Unreal
Engine. Use the program UnrealVersionSelector in the Unreal
Engine directory:
Engine\Binaries\Win64.
- If you have updated your engine version, try deleting the
Intermediate directory in the Cube sample under
samples\ue4\cube\app.
- Clean and load the project configuration.
genvid-sdk clean-config
genvid-sdk load-config-sdk
py cube.py load
- Start the project.
Genvid integration
The GameStreamer class makes it possible to automatically
integrate the Genvid SDK. The class BP_Cube contains all required Genvid
code. The screenshot shows which parts are Genvid.
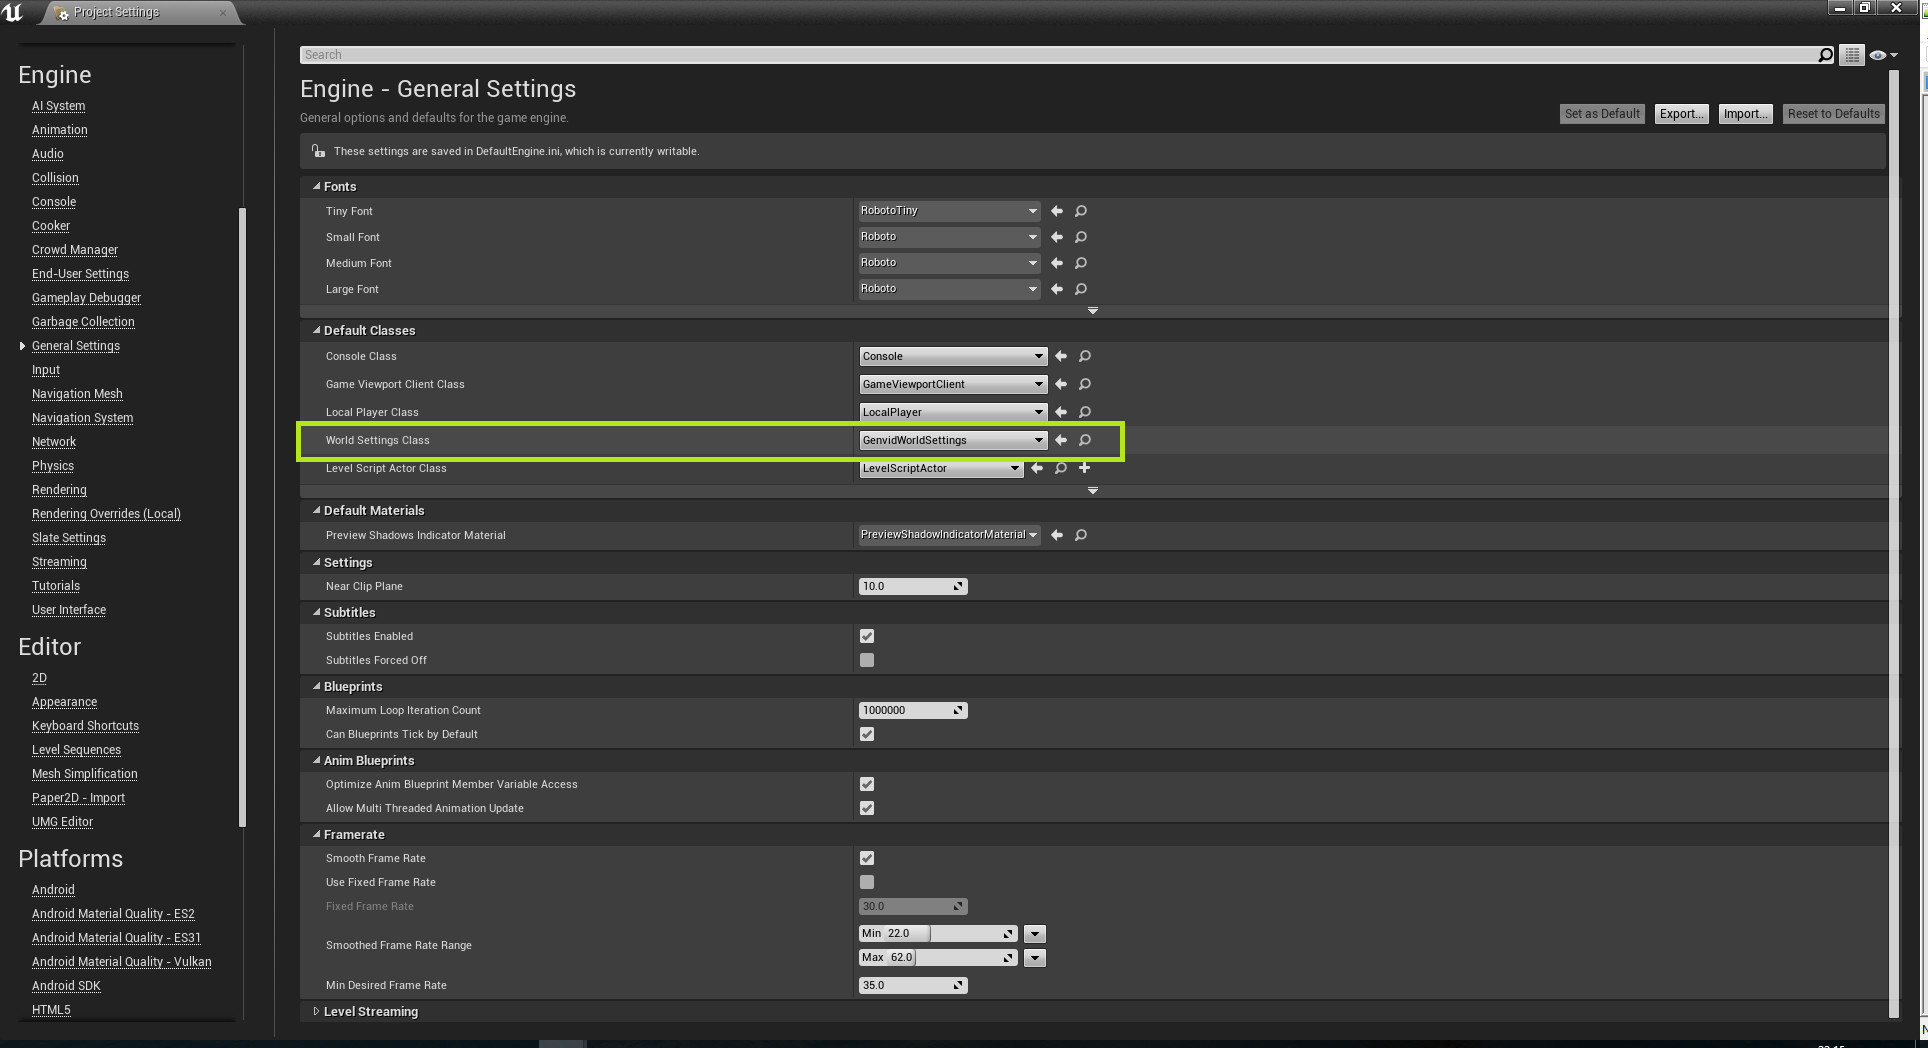
We currently have only one video stream and one audio stream. The Genvid Module
can automatically manage both through the class
AGenvidWorldSettings. Go to the
Engine General Settings window in Project Settings and set
World Settings Class to GenvidWorldSettings (General Settings) to enable automatic management.
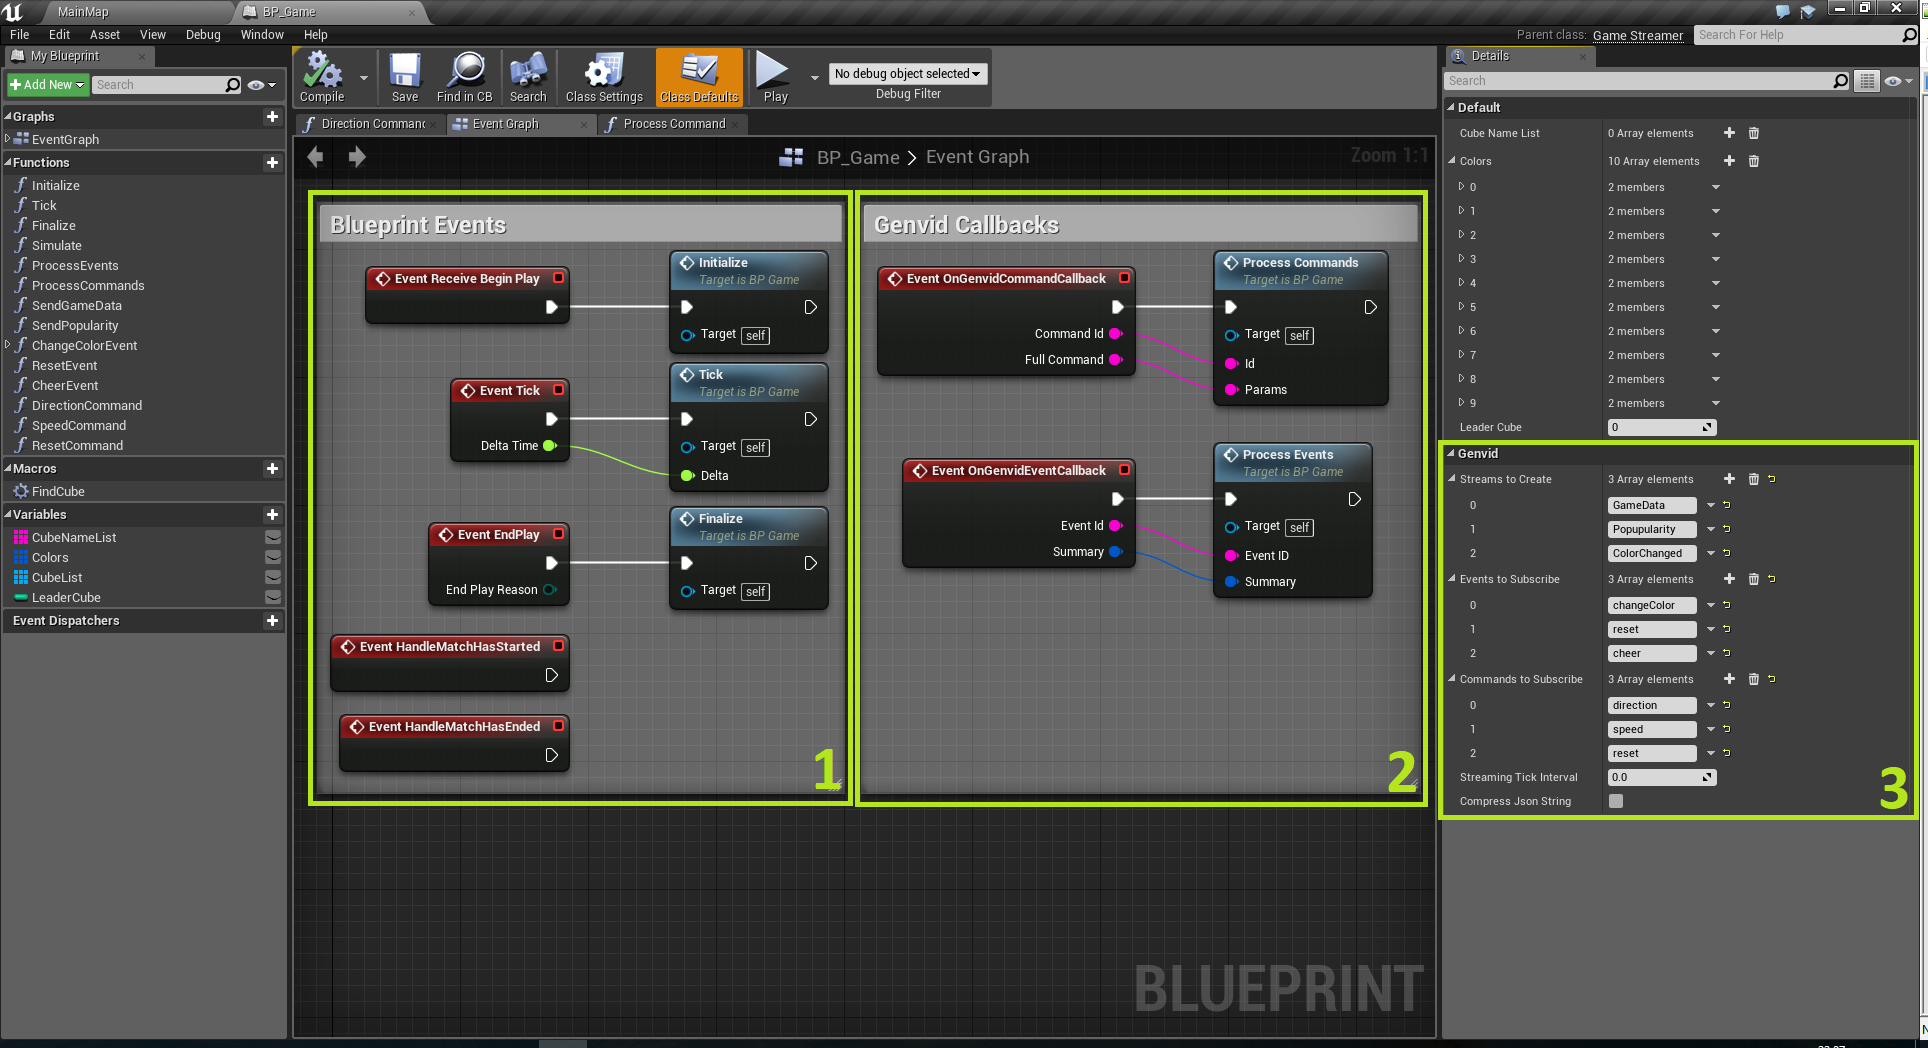
We create 3 streams to send some game data to the servers
(Blueprint Game class, Section 3). One for game data, one for popularity, and one
for color change.
Next, we declare all the events and commands coming from the
web page. In our case, we catch 3 actions that can occur on the web page
(Blueprint Game class, Section 2):
- a color change,
- a position reset, or
- a popularity change.
To start Genvid, call the Startup function in
Event Receive Begin Play (Blueprint Game class, Section 1).
Finally, select the streamer class BP_Game in the World Settings
(Main Map).
At this stage, you’re ready!
Notes
The Genvid Module automatically manages all Streams, Events, Commands, and
Audio/Video Capture initialization and finalization.
JSON automatically serializes structures when you submit game data to the
server.
There is no need to call the Shutdown function, as exiting the
application automatically calls it. You can call it explicitly if you want
without any problems.
Assets
- MainMap : The game level map.
- Colored_Steel : The material used by the cube.
- galvanized_steel : The texture used by the material of the cube.
- EdSplash.bmp : A splash screen used by the Unreal Editor.
- Splash.bmp : A splash screen used by the Cube sample.