Unreal Engine Genvid SDK Editor Module
The Genvid MILE SDK editor module provides an easy way to switch between SDK versions.
To open the Genvid SDK editor window, click the Genvid MILE SDK icon in the Unreal Engine editor toolbar.

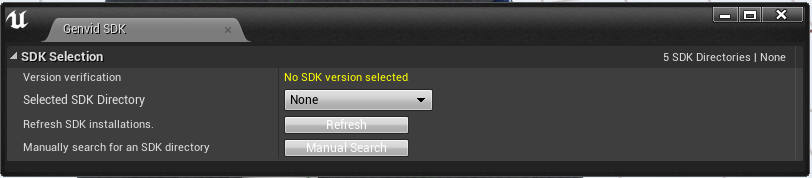
The first time you open the editor window, there won’t be a preselected SDK version.
In This Section
SDK Selector
Under SDK Selection, the Selected SDK Directory
dropdown lists all known SDK installations on your machine. Select an option
from the dropdown to copy the include, win32, and win64
folders from the target SDK directory to your game.
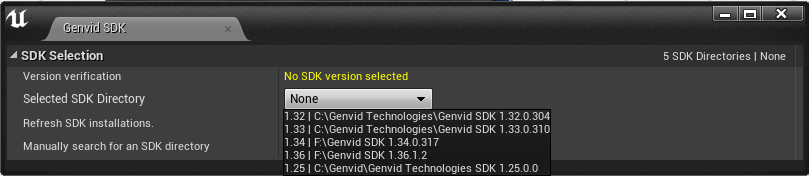
Refresh SDK Installations
If you install or uninstall a version of the SDK while the Genvid SDK editor window is open, click the Refresh button to update the selection dropdown.
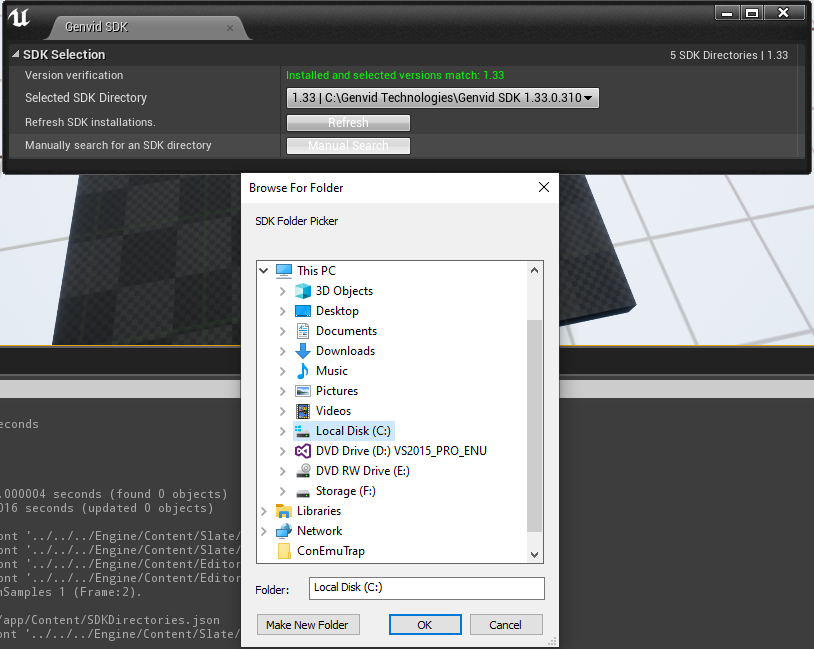
Manual Search
The Manual Search button lets you add an SDK installation directory not automatically found by the editor. This may be the necessary if you either install a version of the Genvid MILE SDK without using the intaller or move the SDK after installing.
Click the Manual Search button to add a missing SDK directory. The Genvid SDK editor module will remember the added path so that you don’t have to add it every time you use the editor.
Version Verification
The Genvid SDK editor module verifies that the version of the Genvid library used in your project matches the one in the selected SDK directory.
The verification is done when:
The Genvid SDK editor window is opened.
A selection is made through the SDK Selection dropdown.
An SDK directory is added using the Manual Search button.
The SDK selection is updated through the Refresh button.
The result is displayed in the Version verification section.
Versions matching:

Versions not matching:
