Set up Blueprints
Once you create all the necessary Blueprints, you need to set them up.
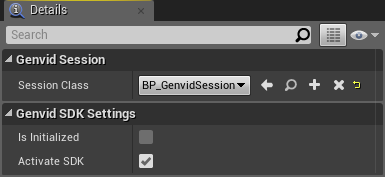
BP_GenvidSessionManager
The BP_GenvidSessionManager class is a Data-Only Blueprint. You use it
to select the Genvid Session.
In the Details tab:
- Select the
GenvidVideo Blueprint
you created for the Session Class you want to use.
- Select the Activate SDK option.
Note
We designed the Genvid Module to potentially
handle multiple sessions in the future. For now, a
GenvidSessionManager instance may only contain a single
GenvidSession based on the current Genvid SDK design.
BP_GenvidSession
The BP_GenvidSession class is a Data-Only Blueprint. You use it to select
the classes for the Video, Audio, Streams, Events, and Commands.
In the Details tab select the Blueprint you created for each class.
(For example, select the Blueprint you created from GenvidVideo for
Video Stream Class.)
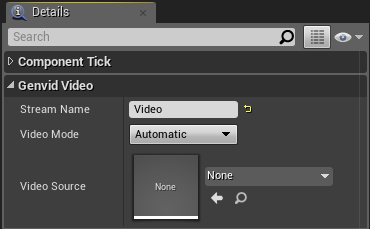
BP_GenvidVideo
The BP_GenvidVideo class is a Data-Only Blueprint. You use it to set the
parameters for a video stream:
- Stream Name: Unique name for the video stream.
- Video Mode: Video capture-mode. (
Automatic or Texture)
- Video Source: Video data-source. (Only if required by the
Video Mode selected.)
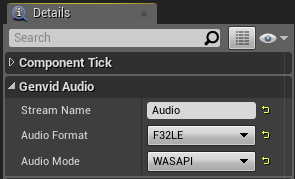
BP_GenvidAudio
The BP_GenvidAudio class is a Data-Only Blueprint. You use it to set the
parameters for a audio stream:
BP_GenvidStreams
The BP_GenvidStreams class contains all required code to create and manage
all the streams.
Use the GenvidStream structure to create a stream. Type
Make GenvidStream in the All Possible Actions context menu to
add it to the Event Graph.
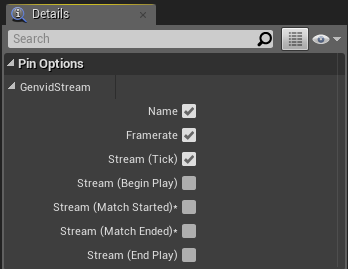
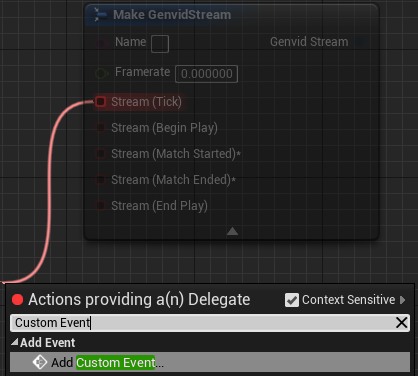
Once you have added the node, you can set the stream parameters:
- Name: Unique name of the data stream.
- Framerate: Rate to send the stream.
- Stream (Tick): Event is called every frame. (Set by
Framerate.)
- Stream (Begin Play): Event is called one time when the stream
is created.
- Stream (Match Started): Event is called one time when the game
starts.
- Stream (Match Ended): Event is called one time when the game
ends.
- Stream (End Play): Event is called one time before the stream
is destroyed.
Note
The Framerate property is only available for the event
Stream (Tick).
Set the Framerate property to 0 to call the event only one time.
For each stream event you select:
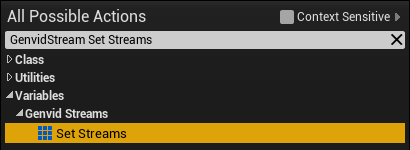
- Add a Custom Event. (Type
Custom Event in the
All Possible Actions context menu to add it to the
Event Graph.)
- Add a node to the function you want to call from your Custom Event.
Caution
Stream Events are optional. If you select a stream event but you
don’t link it to a custom event the Blueprint won’t compile. Either link it
to a custom event or deselect it.
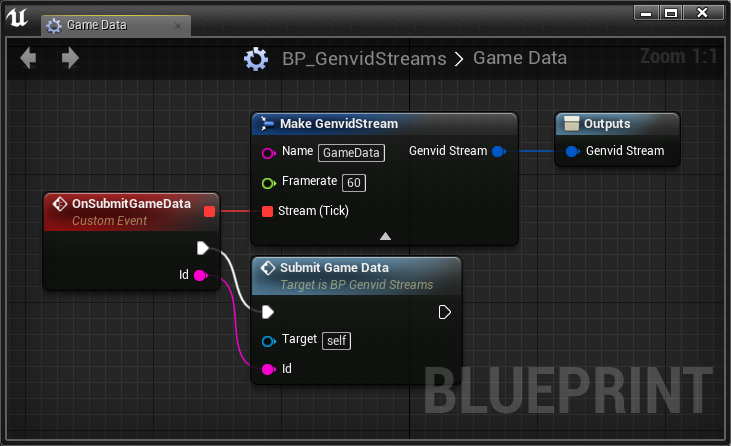
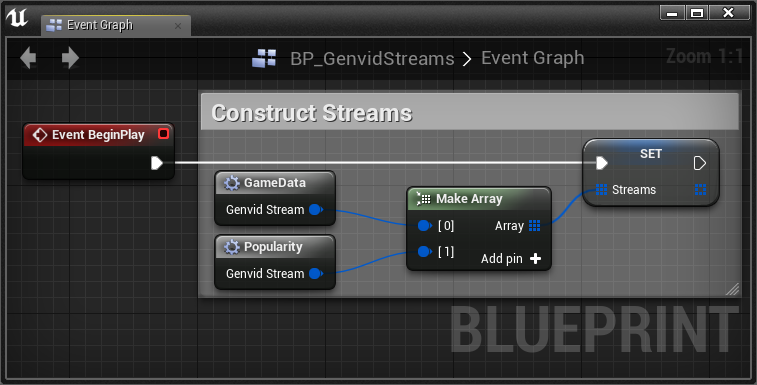
After creating the Stream Event, add it to the Set Streams variable.
The following images are examples of what fully-defined stream Blueprints look
like. Your own Blueprints will vary, depending on how you decide to arrange and
manage streams for your application.
BP_GenvidEvents
The class BP_GenvidEvents contains the code required to create and
manage all Stream Events.
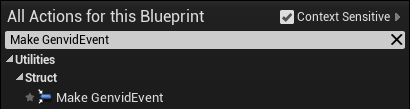
Use the GenvidEvent structure to create an
event subscription. Type Make GenvidEvent in the All
Possible Actions context menu to add it to the Event
Graph.
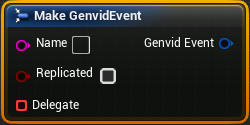
Once you have added the node, you can set the event parameters:
- Name: Unique name for the data stream.
- Replicated: Call the delegate on client or server (Authoritative client/server networking model).
- Delegate: Event triggered when the Genvid SDK receives an
event.
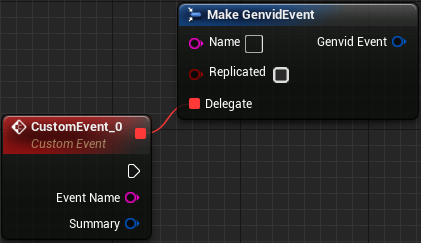
From the Delegate parameter:
- Add a Custom Event. (Type
Custom Event in the
All Possible Actions context menu to add it to the
Event Graph.)
- Select
Add Custom Event... to add a node with predefined parameters.
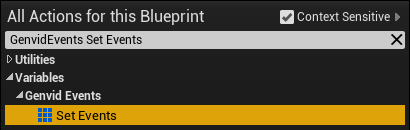
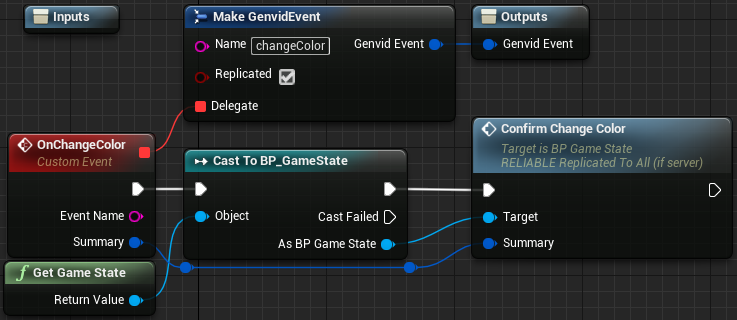
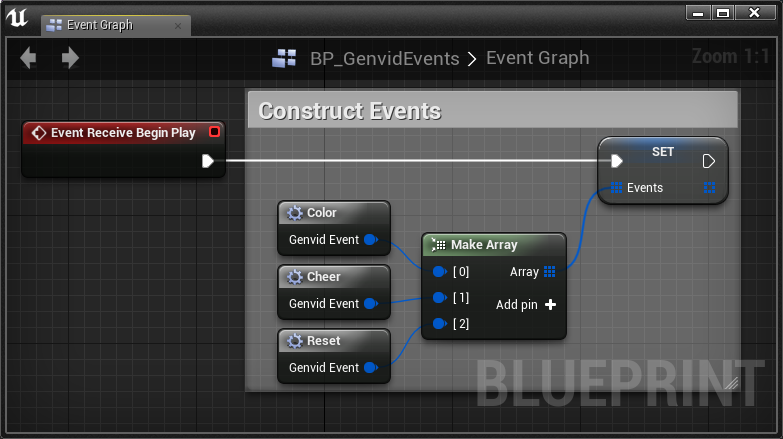
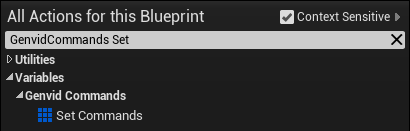
Now add the new event to the Genvid Events variable.
- Type GenvidEvents Set Events in the All Possible Actions
context menu.
- Select
Set Events.
The following images are examples of what fully-defined event Blueprints look
like. Your own Blueprints will vary, depending on how you decide to arrange and
manage events for your application.
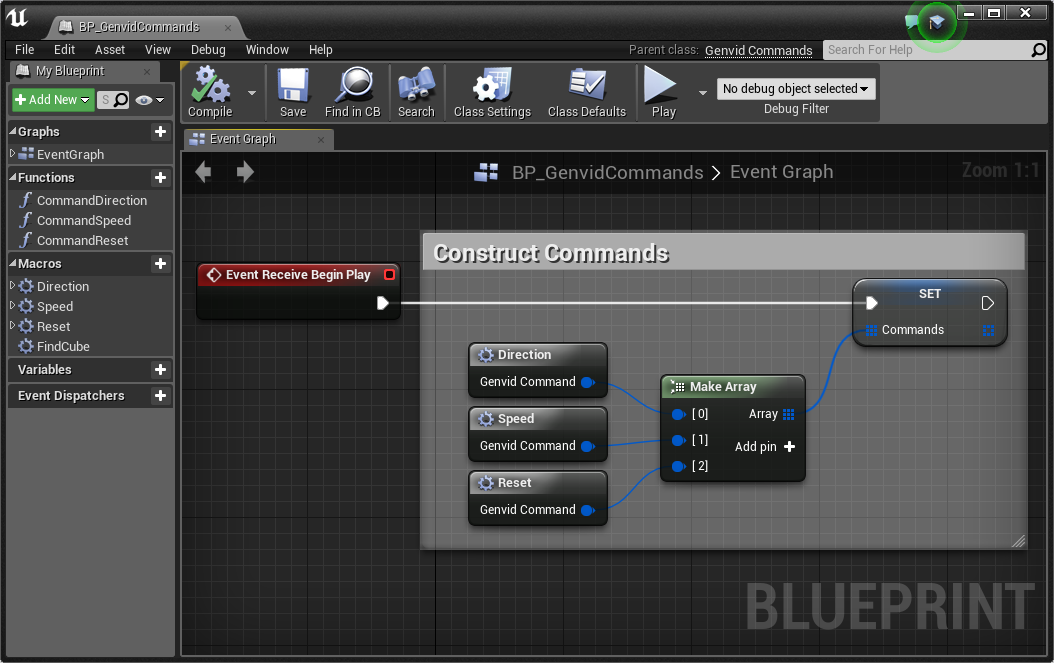
BP_GenvidCommands
The BP_GenvidCommands class contains the code required to create and
manage commands.
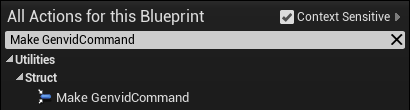
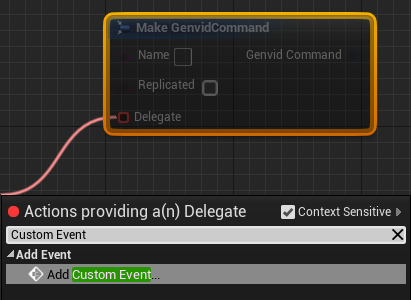
Use the GenvidCommand structure to
create a new command subscription. Type Make GenvidCommand in the
All Possible Actions context menu to add it to the
Event Graph.
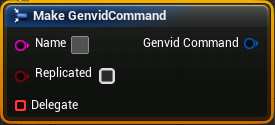
Once you have added the node, you can set the command parameters:
- Name: Unique name for the command.
- Replicated: Call the delegate on client or server. (Authoritative client/server networking model.)
- Delegate: Command triggered when the Genvid SDK receives a
command.
From the Delegate parameter:
- Add a Custom Event. (Type
Custom Event in the
All Possible Actions context menu to add it to the
Event Graph.)
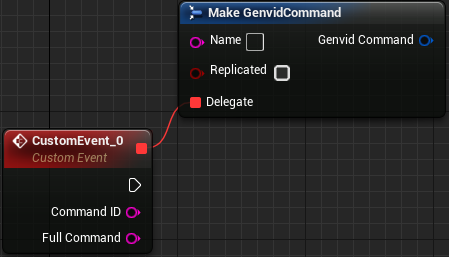
- Select
Add Custom Event... to add a node with predefined parameters.
Now add the new event to the Genvid Commands variable in
GenvidCommands.
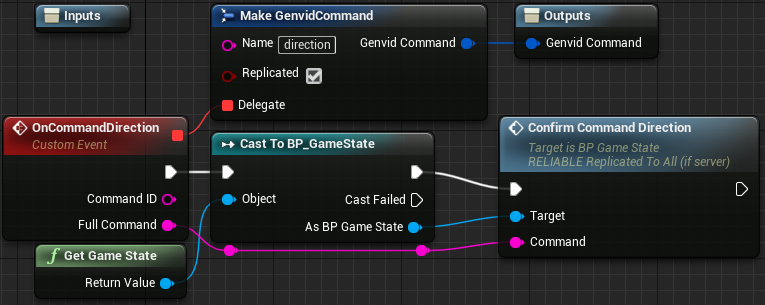
The following images are examples of what fully-defined command Blueprints look
like. Your own Blueprints will vary, depending on how you decide to arrange and
manage commands for your application.
UE4 Cube Sample Blueprints
The Blueprint class BP_Cube contains all required Game code.
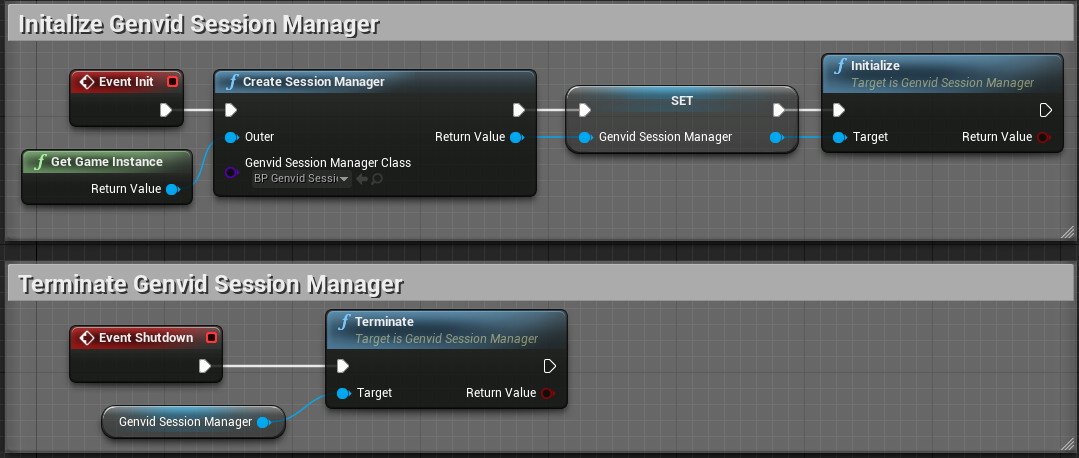
The Blueprint class BP_GameInstance contains all required code to
initialize and terminate a Genvid SessionManager.
It also contains all the code related to the Game Events and Game Commands.
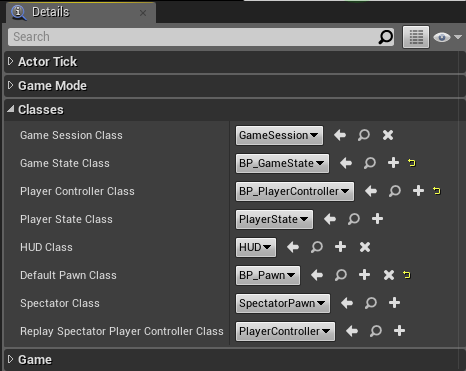
The Blueprint class BP_GameMode contains all the settings to use
customized classes for AGameState and APlayerState based classes.
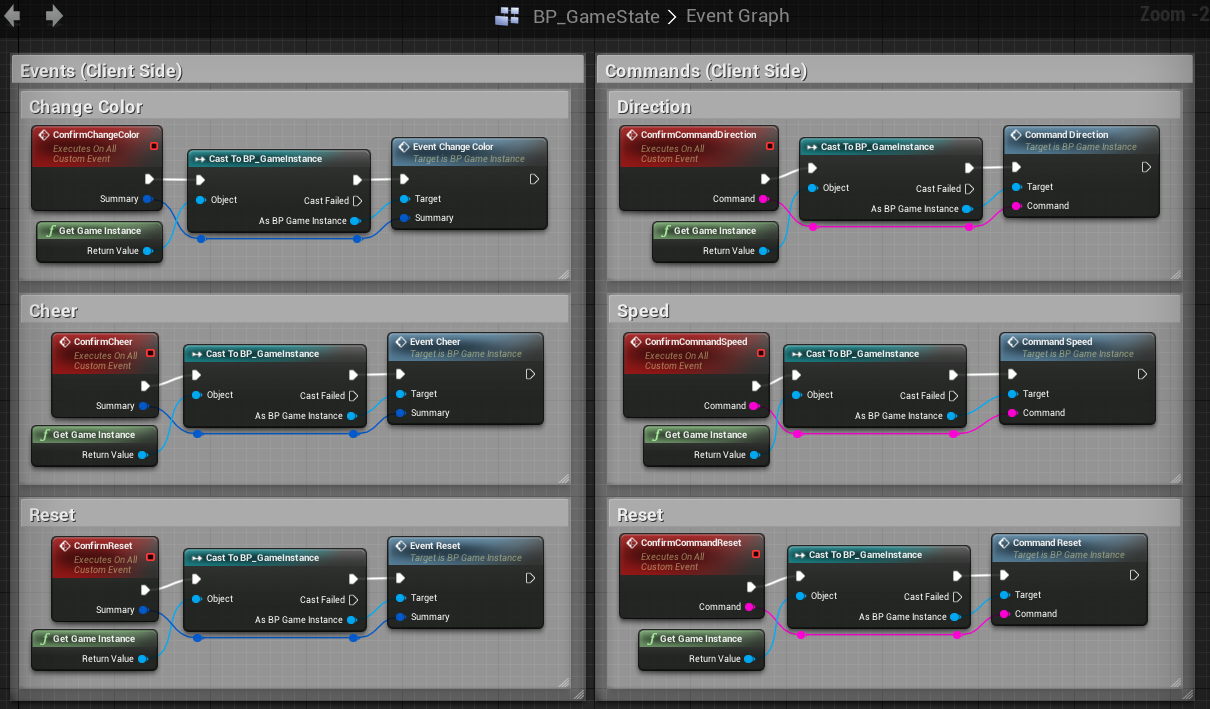
The Blueprint class BP_GameState contains all the required code to receive
the Genvid Events and Commands.
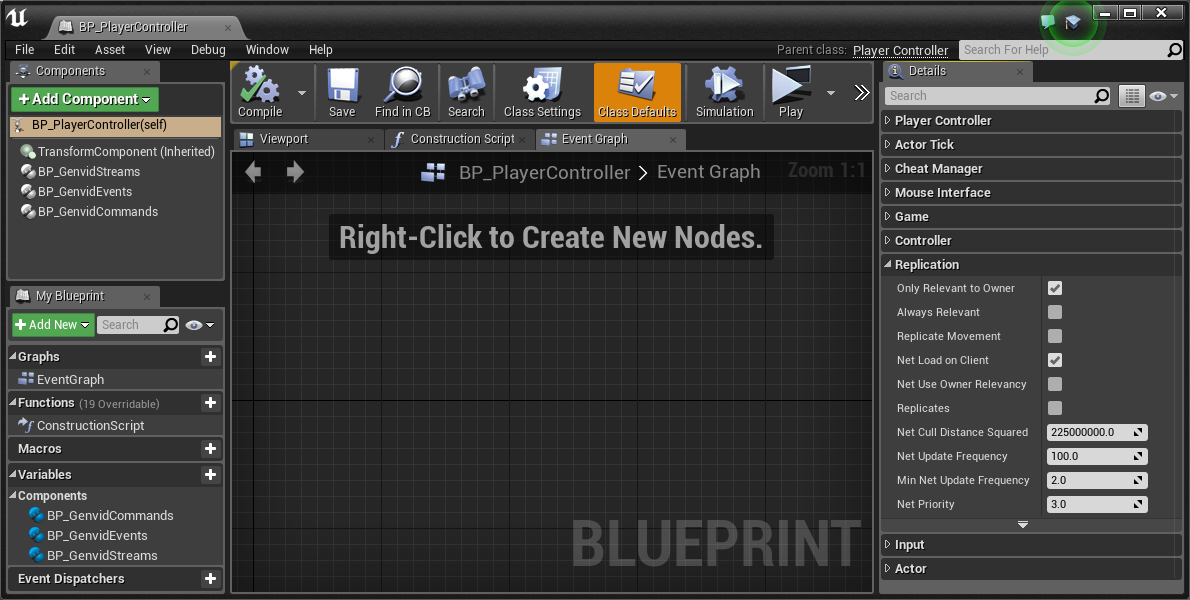
The Blueprint class BP_PlayerController contains three components:
- BP_GenvidStreams
- BP_GenvidEvents
- BP_GenvidCommands
This is necessary to follow the Genvid SDK Client/Server architecture.
Take a look at Unreal Engine 4 Genvid Client/Server
for more information.
Note
All data structures are automatically serialized in JSON when you
submit game data to the server.